Welcome to your ultimate guide on replacing an existing retaining wall! Whether your current wall is starting to show signs of wear and tear, struggling with drainage issues, or simply outdated, tackling a replacement might seem overwhelming. But don’t worry—this comprehensive guide will walk you through everything you need to know to replace your retaining wall, from recognizing when it’s time for a change to the step-by-step process of removal and rebuilding. Whether you’re a DIY enthusiast ready to get your hands dirty or considering bringing in professional help, we’ve got you covered. Let’s dive in and explore how to give your landscape a fresh, sturdy new look!
To replace an existing retaining wall, start by assessing its condition to determine if replacement is necessary due to cracks, leaning, or poor drainage. Next, remove the old wall and prepare the site by leveling the ground and ensuring proper drainage. Build a sturdy foundation with compacted gravel, then stack the new materials, reinforcing the wall as needed. Finish by backfilling with gravel and ensuring proper drainage to prevent future issues. Regular maintenance will help extend the lifespan of your new retaining wall.
- Signs That It's Time To Replace Your Retaining Wall
- DIY Vs. Hiring A Professional: What To Consider
- Planning Your Retaining Wall Replacement
- Step-By-Step Guide: How To Replace An Existing Retaining Wall
- Maintenance Tips For Your New Retaining Wall
- Common Mistakes To Avoid
- FAQs: About Replace Existing Retaining Wall
- How do I know when it's time to replace my retaining wall?
- Can I replace a retaining wall myself, or should I hire a professional?
- How much does it cost to replace a retaining wall?
- What is the best material to use for a retaining wall replacement?
- Do I need a permit to replace an existing retaining wall?
- How long does it take to replace a retaining wall?
- What are the common mistakes to avoid when replacing a retaining wall?
- How do I ensure proper drainage for my retaining wall?
- How long will my new retaining wall last?
- What maintenance is required for a new retaining wall?
- Conclusion
Signs That It’s Time To Replace Your Retaining Wall
Retaining walls are essential structures that serve both functional and aesthetic purposes in your landscape. Over time, however, they can start to show signs of wear and tear. Knowing when to replace a retaining wall is critical for maintaining the safety, stability, and beauty of your outdoor space. Here are some key indicators that it might be time to consider a replacement.
Cracks and Shifts
One of the most noticeable signs that your retaining wall may need replacing is the appearance of cracks. While small cracks might seem insignificant at first, they can quickly escalate into bigger problems if not addressed. These cracks can indicate underlying structural issues, such as soil movement, pressure from behind the wall, or even foundational instability. Over time, small cracks can widen, compromising the wall’s ability to retain soil effectively. If you observe your retaining wall starting to shift, this could be a red flag that the wall’s foundation is failing. Shifting walls are a serious concern, as they suggest that the structure is no longer strong enough to perform its intended function. When left unchecked, these shifts could result in a complete collapse, posing a risk to your landscape and safety.
Bulging or Leaning
A bulging or leaning wall is another clear indication that your retaining wall is failing. This typically occurs when the wall can no longer withstand the pressure exerted by the soil it is holding back. The excessive pressure can be due to poor construction, soil erosion, or even saturation from water buildup. When a wall begins to lean or bulge outward, its structural integrity is compromised, and it’s no longer safe. In many cases, this is an irreversible issue, and replacement is often the best option to ensure safety and prevent further damage to your property.
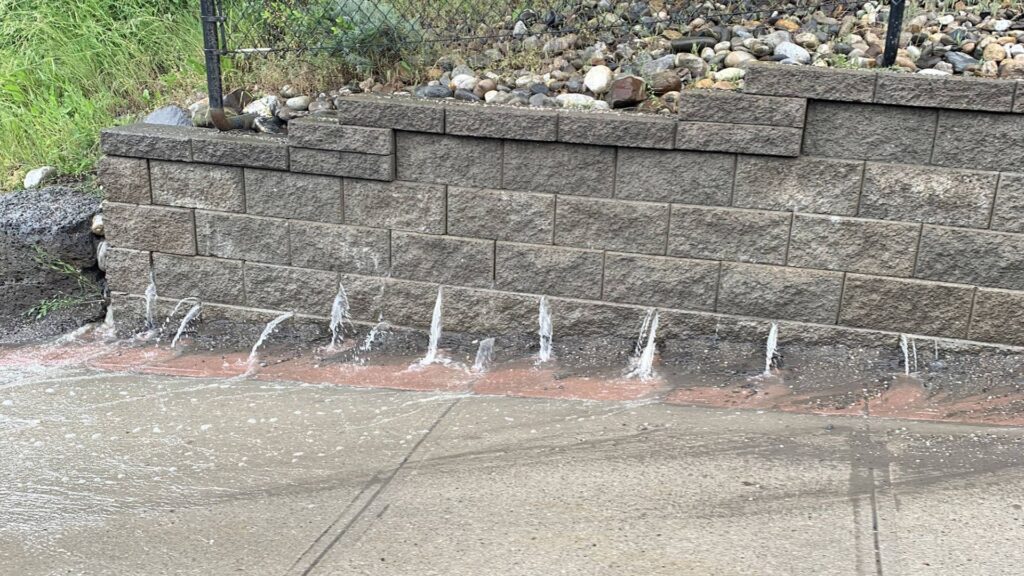
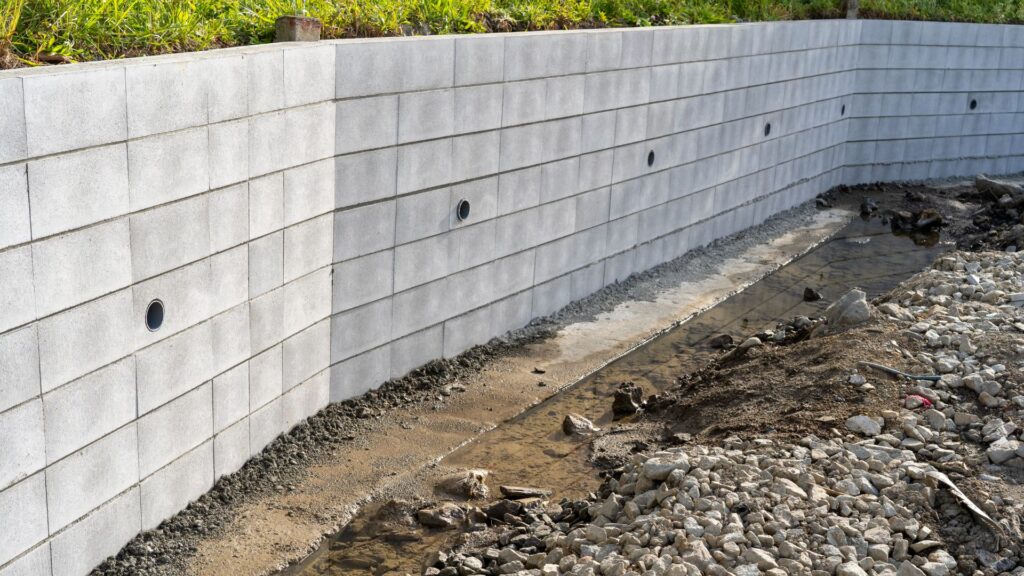
Drainage Problems
Proper drainage is vital to the longevity of a retaining wall. When water cannot flow freely away from the wall, it builds up behind it, increasing the pressure and leading to potential failure. Poor drainage can cause a range of issues, from soil erosion to foundation damage. You might notice signs such as water pooling around the base of the wall or water seeping through the cracks. Over time, water damage can weaken the materials, causing them to degrade and lose their effectiveness. If drainage problems are persistent, it may be time to consider replacing the wall with a new design that incorporates better drainage solutions.
Aging Materials
Like any outdoor structure, retaining walls are subject to the natural aging process. Depending on the material used, the lifespan of a retaining wall can vary. Wood, for instance, is prone to rotting and warping over time, especially when exposed to moisture. Stone and concrete walls, while more durable, can still deteriorate after years of exposure to the elements. When the materials start showing visible signs of wear, such as crumbling mortar or decaying wood, it’s often more cost-effective to replace the wall rather than attempting constant repairs. Newer materials and construction methods can offer improved durability, ensuring your new wall lasts for many years.
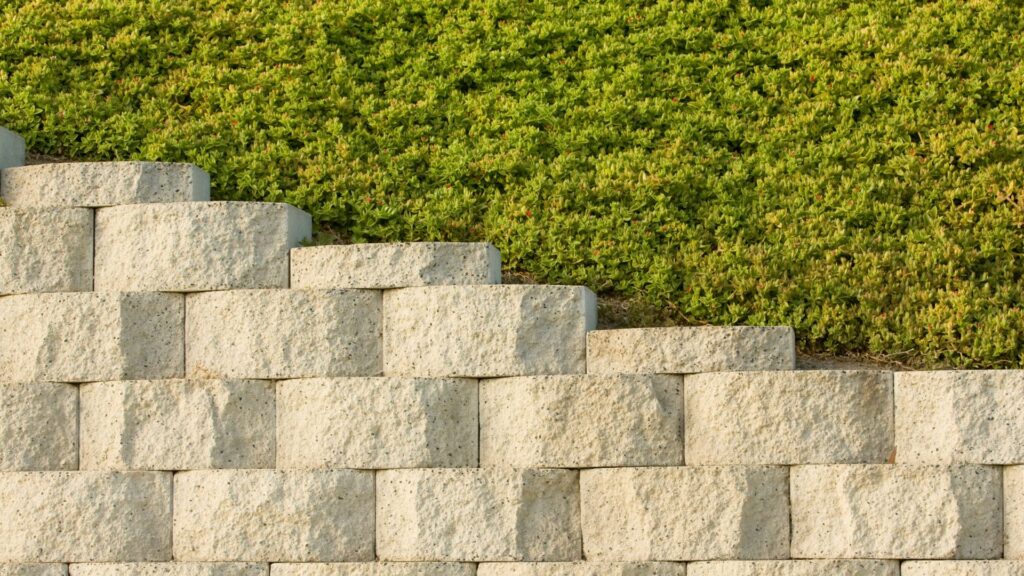
Aesthetic Considerations
In some cases, the decision to replace a retaining wall isn’t based on damage but on aesthetics. As trends in landscaping evolve, your retaining wall might start to feel outdated or no longer fit with the overall look of your yard. Whether you want to refresh the style of your outdoor space or align the wall with a new garden design, replacing an old retaining wall can have a significant impact on the appearance of your property. Modern materials, colors, and designs can enhance the visual appeal of your landscape, adding value and functionality.
Retaining walls are crucial elements of any well-designed landscape, but they aren’t meant to last forever. If your retaining wall is showing signs of cracks, shifting, bulging, drainage issues, or material degradation, it’s important to consider a replacement before the problem worsens. And even if the wall is structurally sound, a replacement may be warranted for aesthetic reasons, helping you achieve a fresh, modern look for your outdoor space. Regular inspections and proactive maintenance can help you determine the right time to make this important investment.

DIY Vs. Hiring A Professional: What To Consider
When faced with a project, deciding between tackling it yourself or hiring a professional can be a daunting task. From assessing your skill level to weighing costs, there are several important factors to keep in mind before making your decision. Here’s a detailed breakdown to help guide you through the process.
Skill Level Assessment
One of the most crucial steps in determining whether to take on a DIY project or hire a professional is an honest assessment of your skills. While DIY projects can save you money, they require a certain level of competency to be successful.
For example, if you’re planning to build a retaining wall, you’ll need to be comfortable with basic construction concepts. This includes understanding measurements, leveling, and ensuring structural stability. You’ll also need to have access to the right tools—think of items such as shovels, levels, and possibly a compactor or concrete mixer. In addition, physical labor is a huge part of DIY projects. Be prepared for strenuous activity such as digging, lifting, and long hours of manual work.
If you’re new to these skills or unsure of your ability to execute them safely and accurately, hiring a professional might be a better choice. Professional contractors are trained to handle complex tasks and can ensure that the work is done efficiently and correctly.
Scope of the Project
Another key factor in your decision-making process is the scope of the project. Not every project is suitable for DIY, and understanding the limitations is essential to achieving the best outcome.
For instance, small-scale projects like building a short wall under four feet are typically within the scope of an experienced DIYer. These projects are usually straightforward and manageable, allowing you to follow step-by-step guides to complete them on your own.
However, if you’re dealing with larger or more complex tasks, such as constructing taller walls, working on uneven or sloped landscapes, or handling areas that require specialized permits, it’s generally wise to hire a professional. Larger projects often come with added complications such as drainage systems, specialized materials, and safety regulations that the average homeowner may not be equipped to manage.
Budget Considerations
Cost is often the deciding factor for many homeowners when choosing between DIY and professional help. DIY projects can save you significant money on labor, but it’s important to consider all aspects of the budget before jumping in.
First, calculate the cost of materials. You’ll need to research the specific materials required for your project, as prices can vary depending on quality and quantity. Keep in mind that some DIY projects may also require you to purchase or rent specialized tools, which can increase the overall cost.
Next, compare this to the cost of hiring a contractor. While professional labor can be expensive, it often includes guarantees on the work, as well as the convenience of having an experienced team handle the job. Be sure to request detailed estimates from contractors to understand exactly what’s included in their pricing—sometimes the peace of mind provided by a professional can outweigh the savings of doing it yourself.
Time and Effort
Lastly, consider the time investment involved in a DIY project. Time is a valuable resource, and depending on the scope and complexity of the task, a DIY project can take anywhere from a weekend to several months to complete.
Before starting, think about whether you have the time to commit to the project. This includes not only the construction phase but also time for preparation, research, and potential troubleshooting along the way. Additionally, if the project drags on longer than expected, it can disrupt your routine and even impact your living space, especially for larger projects like home renovations.
If you’re already managing a full-time job, family responsibilities, and other commitments, taking on a large DIY project might add unnecessary stress to your life. Hiring a professional can save you time and energy, allowing you to focus on other priorities while the work gets done efficiently.
Final Thoughts
Ultimately, deciding between a DIY project and hiring a professional boils down to an honest evaluation of your skills, time, budget, and the complexity of the project. Smaller, more straightforward tasks can often be handled by a capable DIYer, especially when cost savings are a priority. On the other hand, larger, more intricate projects that require specialized knowledge and equipment are better suited for professionals. Consider all these factors carefully to make the best decision for your home improvement needs.
Planning Your Retaining Wall Replacement
Planning a retaining wall replacement is a multi-step process that can significantly impact your landscape’s functionality and aesthetics. To ensure a successful outcome, careful preparation and informed decisions are key. Here’s a comprehensive guide to help you through each stage of the process, ensuring your new wall is sturdy, durable, and visually appealing.
Assess the Old Wall
Before jumping into the replacement process, take a close look at your existing retaining wall. Start by evaluating what worked well and where things fell short. Look for signs of wear such as cracks, bulging, or leaning—these can indicate underlying structural issues. Was the wall built with the proper drainage system, or did water buildup contribute to its deterioration? Understanding these pain points will guide you in planning a more effective replacement. Perhaps the wall’s materials or design were not suitable for your area’s climate or soil conditions, or maybe the overall style no longer matches your current aesthetic preferences. Taking time to assess the old wall thoroughly will help you avoid repeating past mistakes and set a clear vision for the new structure.
Choose the Right Materials
Selecting the appropriate materials is crucial to the success and longevity of your new retaining wall. Not only should the materials suit your personal style, but they must also be practical for your landscape and local conditions. Below are the common material options to consider:
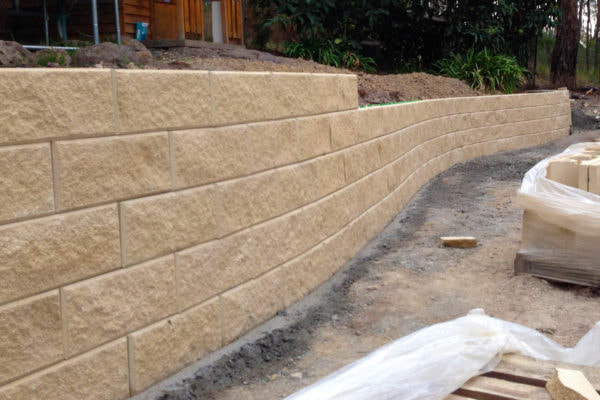
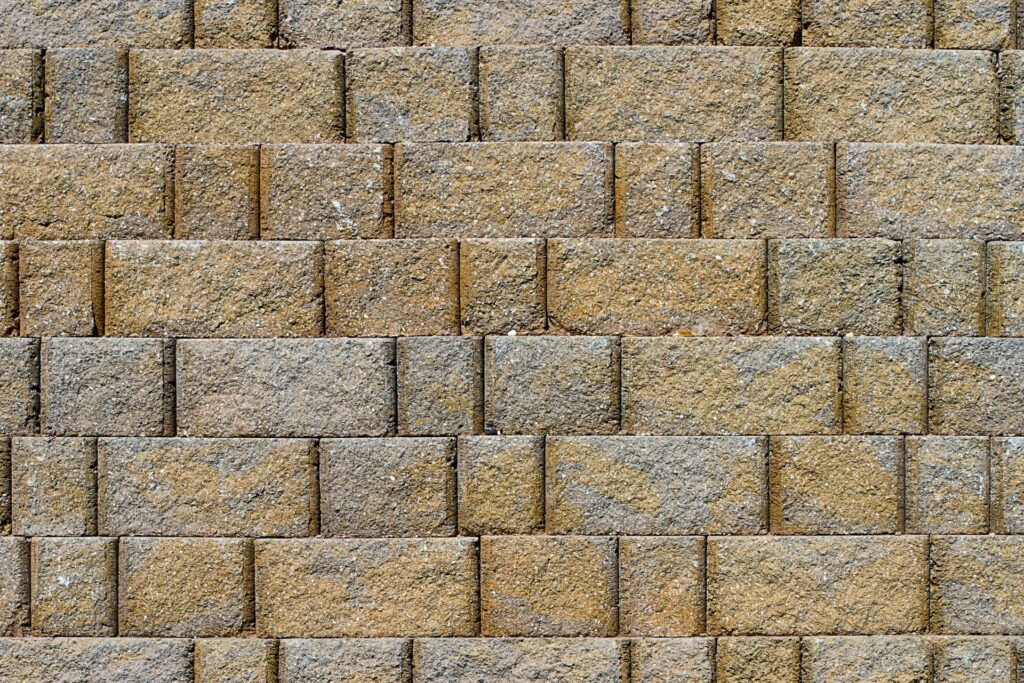
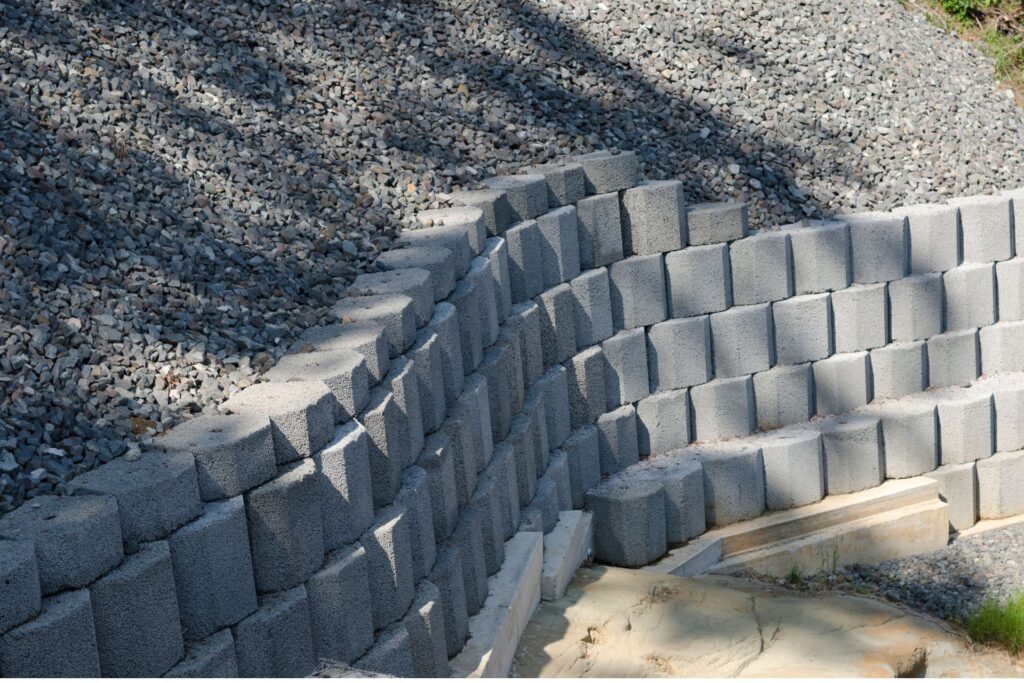
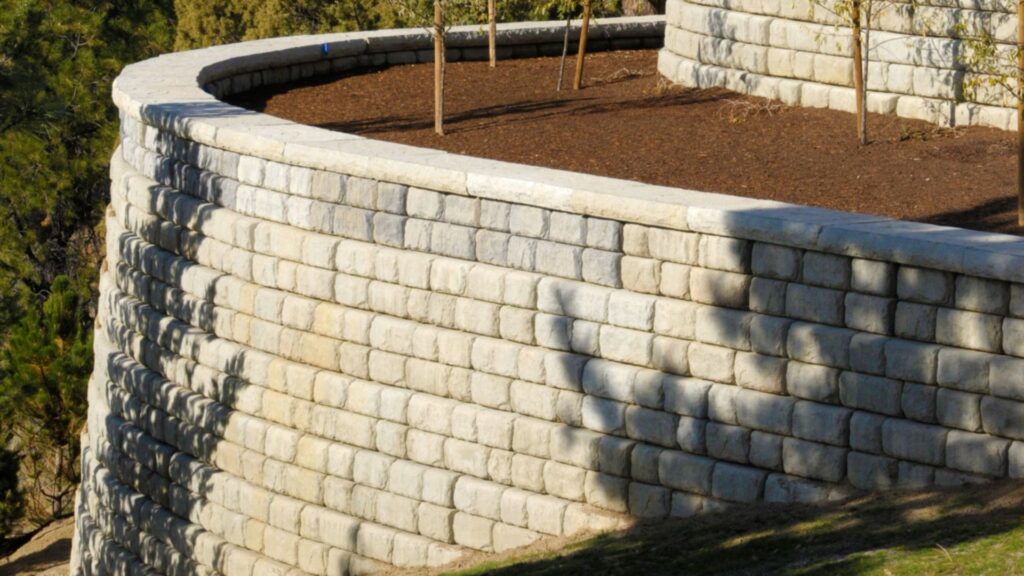
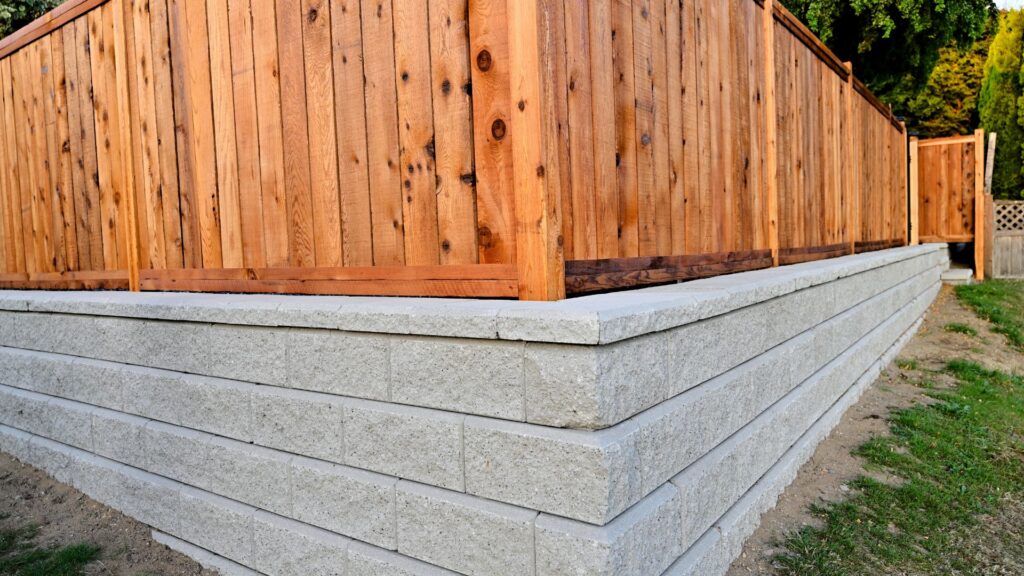
- Concrete Blocks: Known for their durability and versatility, concrete blocks are an excellent choice for large or structural walls. They are easy to install and can be designed to mimic the look of natural stone. Concrete is particularly resistant to the elements, making it a great choice in climates with heavy rainfall or extreme temperatures.
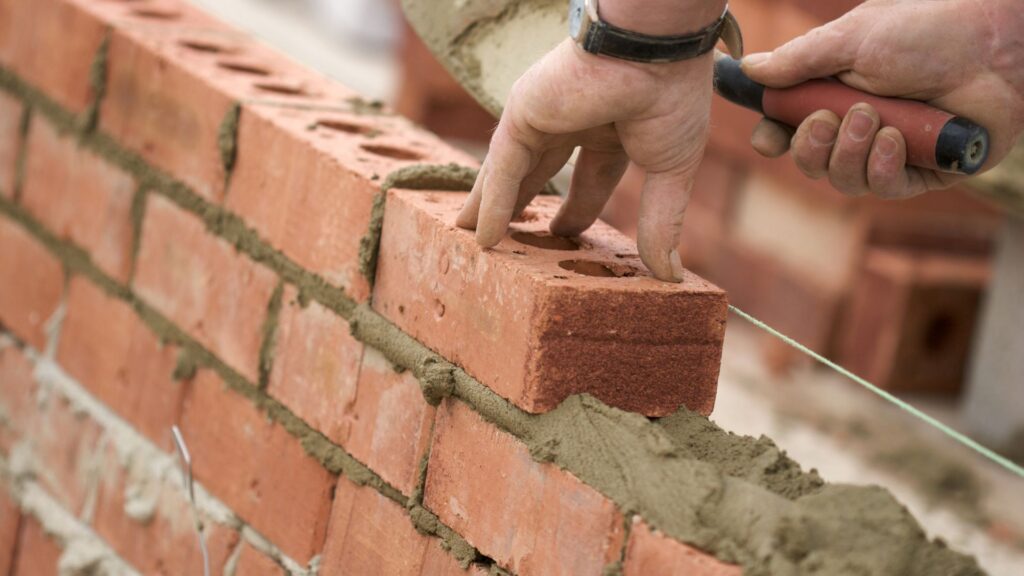
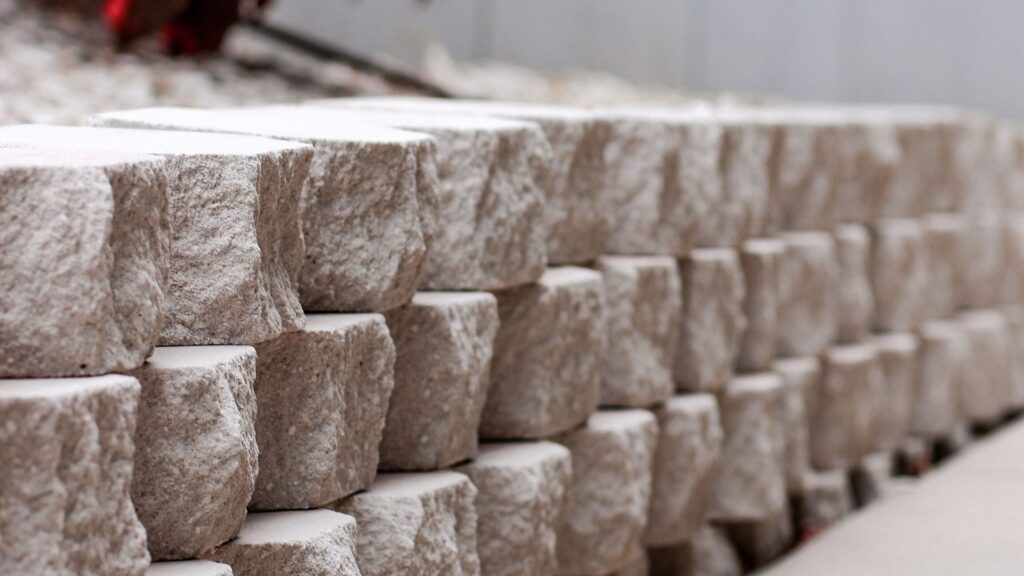
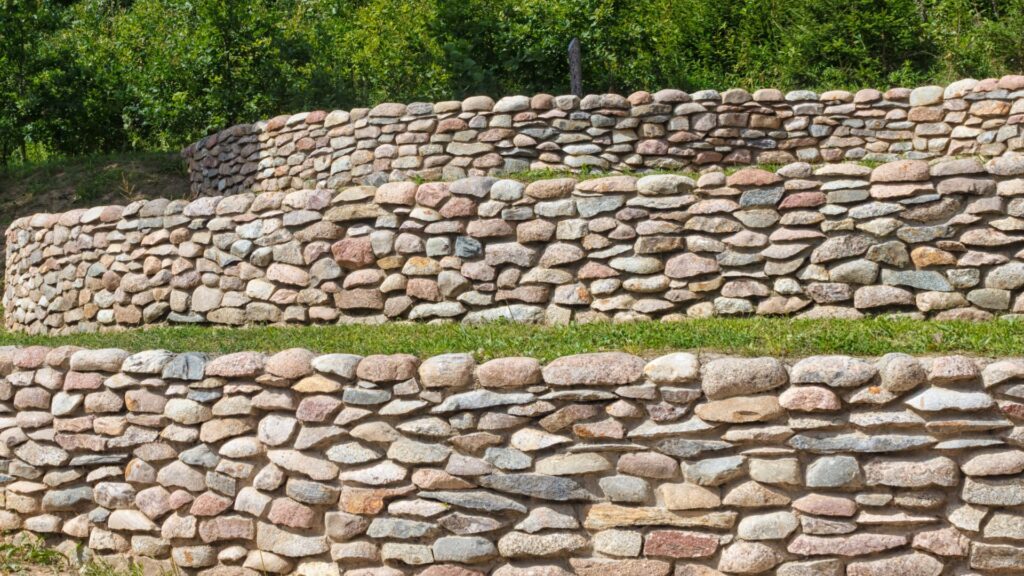
- Natural Stone: If you’re going for a timeless, elegant look, natural stone is the way to go. Stones like granite, limestone, and sandstone provide a high-end appearance that blends seamlessly into most landscapes. However, while stunning, natural stone can be expensive and may require a skilled mason for installation.
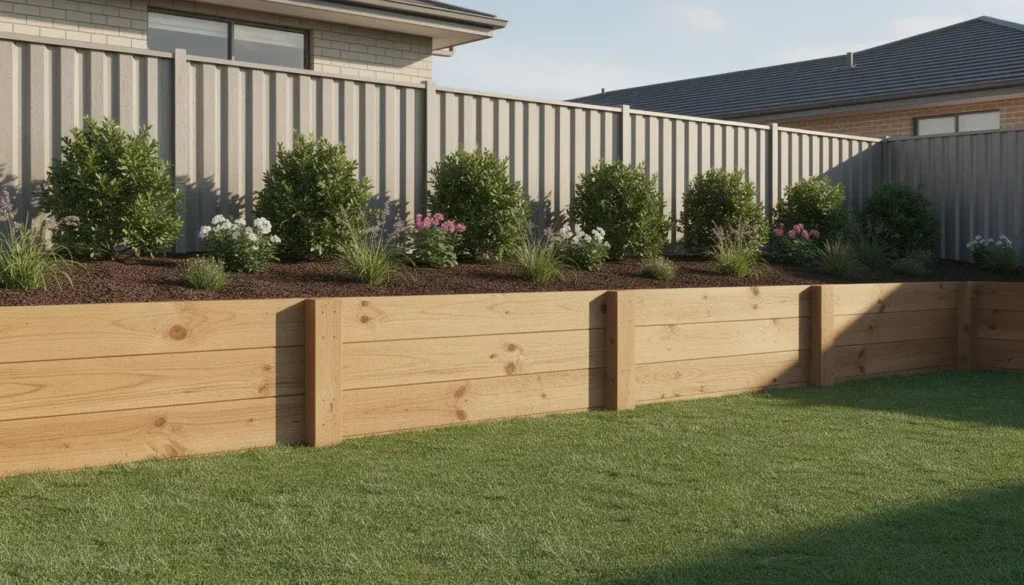
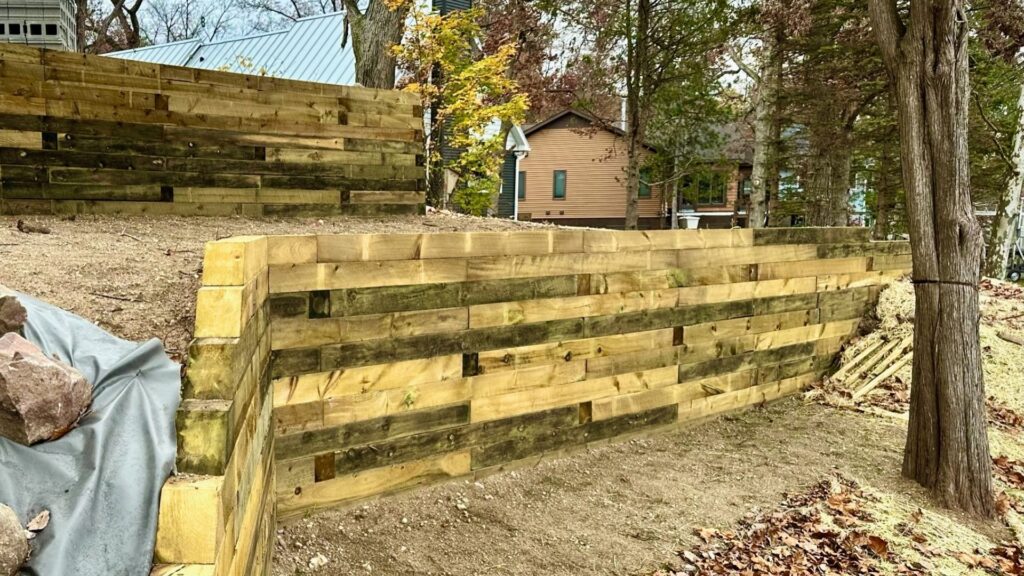
Wood (for small or decorative walls): For those looking to add a rustic or softer touch to their yard, wood is a solid choice for smaller, decorative retaining walls. While affordable and visually pleasing, wood can be susceptible to rot and insects over time, especially in wet climates. Regular maintenance is key to keeping a wooden retaining wall looking fresh and functioning well.
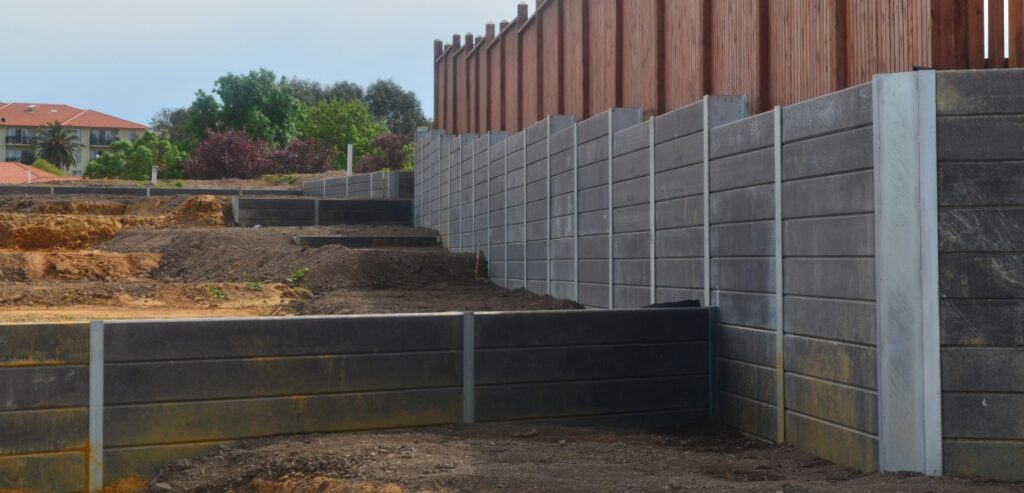
- Modular Systems: These pre-engineered systems are a popular choice for DIY enthusiasts due to their simplicity. Modular blocks come in various sizes, shapes, and colors, offering flexibility in design while providing excellent structural support. They are typically designed to interlock, which helps ensure stability and can make the installation process more straightforward.
- Pro tip: When choosing your materials, always consider your local climate and the type of soil in your yard. For example, if you live in an area with freezing winters, you’ll need materials that can withstand frost heave. Likewise, well-draining materials like concrete and modular blocks might be better for areas prone to heavy rain or erosion. Think long-term to ensure your investment stands the test of time.
Design Considerations
Your new retaining wall should be as functional as it is beautiful. Before beginning construction, consider key design elements like height, shape, and the overall purpose of the wall. Is the wall primarily decorative, or is it needed to prevent soil erosion and manage drainage? Taller walls may require professional engineering to ensure they can withstand the pressure of the soil behind them, while shorter, more decorative walls allow for greater design flexibility.
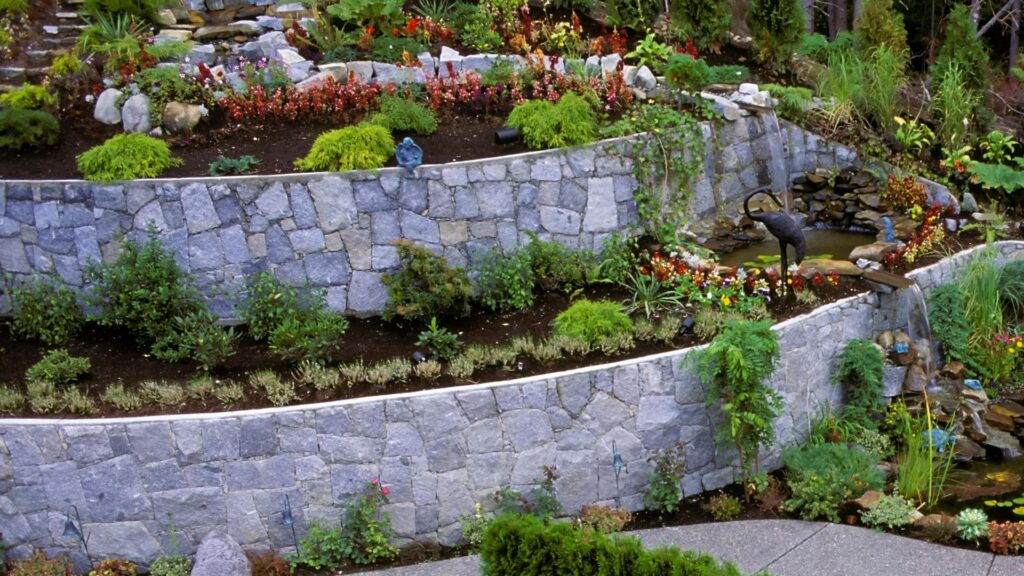
Take into account the overall flow of your landscape when planning the shape and placement of your wall. A curved wall, for example, can create a more natural look that complements rolling hills or a garden, whereas a straight wall offers a clean, modern edge. It’s also important to consider how the wall integrates with your outdoor space. Does it allow for proper drainage? Will it help define garden areas or create new seating spaces? These design decisions will enhance both the aesthetic and functional aspects of your yard.
Local Regulations and Permits
Finally, before breaking ground on your retaining wall project, be sure to check with your local building authorities. Many municipalities have regulations regarding the height and placement of retaining walls, and permits may be required for certain types of construction. This is particularly important for walls over a specific height, as they can pose safety risks if not built to code. Make sure to research any legal requirements in your area to avoid fines or having to tear down a non-compliant structure later on.
In addition to permits, some areas may have rules related to environmental protection, especially if your property is near bodies of water or natural habitats. Consulting with a local contractor or builder who understands these regulations can save you time and ensure your wall is both legal and environmentally responsible.
By following these steps and carefully planning your retaining wall replacement, you can create a structure that not only enhances your landscape’s beauty but also adds value to your property. Remember to take your time with each decision, from assessing the old wall to selecting materials and finalizing the design. This thoughtful approach will result in a lasting and visually appealing retaining wall that serves its purpose for years to come.

Step-By-Step Guide: How To Replace An Existing Retaining Wall
If your retaining wall is starting to show signs of wear and tear, it’s crucial to replace it properly to ensure long-term stability. Here’s a step-by-step guide that walks you through the process of replacing an existing retaining wall. Follow these instructions carefully to ensure a durable, effective wall that will stand the test of time.
Step 1: Preparation
Before you begin the process of replacing your retaining wall, preparation is key. A well-prepared site and having the right materials and tools on hand will save you time and headaches later on.
- Gather Materials and Tools: Start by collecting all the necessary materials and tools. These typically include gravel, retaining wall blocks (or stones), geotextile fabric, a shovel, a level, and a plate compactor. Depending on the design and height of your wall, you may also need additional tools like a circular saw to cut blocks, stakes, and string to mark the level.
- Remove the Old Wall: Safely demolishing the old retaining wall is your next step. If the wall is made of concrete blocks or stones, you can use a sledgehammer to break it apart. When dealing with wooden retaining walls, a pry bar can help dismantle it piece by piece. Take care to recycle or dispose of the old materials properly. Concrete or stone can often be reused as filler in other projects, while wooden components should be responsibly disposed of in accordance with local regulations.
Step 2: Site Preparation
Proper site preparation is the foundation of a successful retaining wall. Ensuring the area is clear and leveled will set the stage for a long-lasting structure.
- Excavate the Area: Begin by excavating the area where the new wall will be built. The excavation should be deep enough to accommodate both the base and the height of the retaining wall. Use a shovel to clear out old debris and vegetation, and make sure the area is as level as possible. A flat, solid surface is crucial for preventing future structural issues.
- Check for Drainage: Poor drainage is one of the main reasons retaining walls fail over time. As you prepare the site, check for any drainage issues and ensure that the base of your wall has a proper drainage system. Installing a perforated pipe along the base, covered by gravel, will help channel water away from the wall, reducing the risk of pressure buildup behind the structure.
Step 3: Build the Foundation
The foundation of your retaining wall is critical to its stability. Skimping on this step can lead to premature failure, so take your time to do it right.
- Install a Solid Base: Begin by installing a compacted gravel base, typically at least 6 to 12 inches deep, depending on the height of the wall. Spread the gravel evenly across the excavated area, ensuring that it extends slightly beyond the footprint of the wall. Once in place, use a plate compactor to press the gravel firmly, creating a solid and stable base.
- Leveling the Ground: After compacting the gravel, it’s essential to check that the ground is level. Use a long level or a laser level to ensure the surface is even across the entire length of the base. This step ensures that your first layer of blocks or stones will be perfectly aligned, which is crucial for the stability of the entire wall.
Step 4: Building the Wall
With the foundation in place, it’s time to start building your retaining wall. This step involves laying the first course of blocks and continuing to build up the wall while maintaining level and alignment.
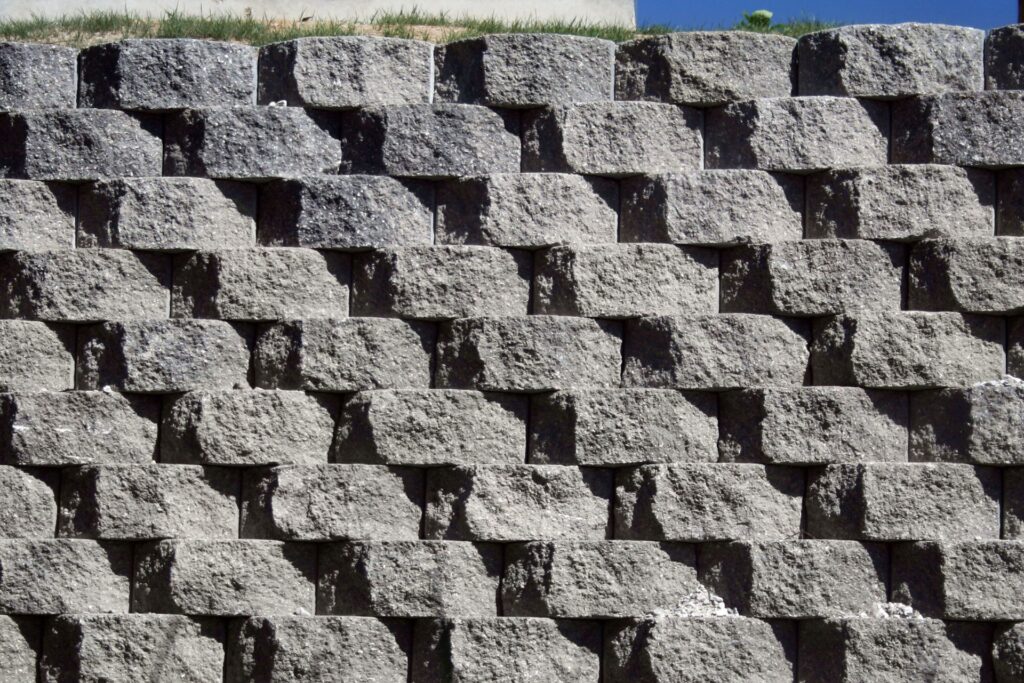
- Lay the First Course: The first row of blocks or stones is the most important, as it sets the stage for the rest of the wall. Lay the first course carefully, ensuring that each block is level from front to back and side to side. It’s important to slightly offset each block so that the joints don’t line up vertically, which helps improve the wall’s strength.
- Stacking the Wall: Once the first course is in place, you can begin stacking additional layers. Make sure each layer is staggered, meaning the joints of one row don’t line up directly with the row below. This pattern will give the wall more strength and prevent weak points. Continuously check that each layer is level as you go.
- Installing Reinforcements: For taller walls, or walls that will bear significant pressure, consider using geogrid reinforcement. This mesh-like material adds extra stability to the wall by reinforcing the soil behind it. To install geogrid, place it between certain layers of the wall (typically every 2-3 feet) and extend it back into the excavated area. Be sure to follow manufacturer guidelines for correct placement and tension.
Step 5: Finalizing the Wall
With the wall built, your job isn’t quite done yet. Final touches ensure the longevity and appearance of the retaining wall.
- Backfill and Compact: After the wall is built, begin backfilling the area behind it with gravel. This step is crucial for allowing water to drain properly through the wall, reducing pressure that could cause it to fail. As you backfill, compact the gravel in layers using your compactor. This ensures a firm, stable fill that won’t settle over time.
- Finish the Top Layer: Once you’ve reached the top of your wall, you can add capping blocks or decorative stones for a polished finish. These caps not only enhance the appearance of the wall but also protect it from weathering. Secure the capstones with construction adhesive to ensure they stay in place.
- Final Drainage Check: Before wrapping up, double-check that your retaining wall has proper drainage features in place. This includes ensuring that the gravel backfill extends all the way down to the perforated drainage pipe, and that water will be directed away from the wall’s base. Proper drainage prevents water buildup, which is a leading cause of wall failure.
Replacing a retaining wall may seem like a daunting task, but with careful planning, the right tools, and this step-by-step guide, you can tackle the project successfully. A properly built retaining wall not only enhances the appearance of your landscape but also ensures the structural integrity of the area for years to come. Follow these steps, and you’ll have a solid, functional retaining wall that stands the test of time.
Maintenance Tips For Your New Retaining Wall
Proper care and maintenance of your retaining wall are crucial for ensuring it lasts for many years. By taking a few simple steps, you can prevent costly repairs and keep your wall looking its best. Here’s a detailed guide on how to care for your new retaining wall:
Regular Inspections
One of the most effective ways to maintain your retaining wall is by conducting regular inspections. Homeowners should make it a habit to walk around and inspect the wall at least twice a year, ideally in the spring and fall. During your inspection, pay close attention to any signs of damage, such as cracks, bulges, or shifting. Even small cracks can indicate a larger structural issue if left unaddressed. If you notice anything unusual, it’s best to consult with a professional to assess the damage before it worsens.
Also, check for any signs of erosion at the base of the wall. Erosion can undermine the foundation of the retaining wall, leading to instability. This is particularly important after heavy rains or significant weather events, which can accelerate wear and tear. Addressing minor issues early on can save you from expensive repairs down the line.
Maintain Drainage
Proper drainage is a critical factor in the longevity of your retaining wall. Poor drainage can cause water to accumulate behind the wall, leading to pressure buildup that can eventually cause the wall to fail. To prevent this, regularly check the drainage system to ensure it is functioning correctly.
Over time, leaves, dirt, and other debris can clog the drainage system, so it’s essential to clear any blockages as soon as possible. You can use a garden hose to flush out the drains or remove any debris manually. Make sure water is draining away from the wall rather than pooling behind it. If you notice consistent drainage issues, you may need to reevaluate the wall’s drainage design or consult a professional for more extensive solutions.
Cleaning and Sealing
Cleaning your retaining wall is not only about aesthetics but also about protecting the materials. Moss, algae, dirt, and grime can accumulate over time, leading to potential deterioration of the wall’s surface. Depending on the material your wall is made of, cleaning can be as simple as using a garden hose to wash away dirt or a pressure washer for tougher stains. Be cautious when using a pressure washer, as high-pressure settings can damage some surfaces, particularly softer materials like natural stone.
For walls made of brick, stone, or concrete, sealing the wall every few years can help extend its lifespan. Sealing provides a protective layer that shields the wall from moisture, stains, and other elements that can cause wear. Before applying a sealant, make sure the wall is thoroughly cleaned and dry. Choose a sealant that is appropriate for the material of your retaining wall and follow the manufacturer’s instructions carefully.
By following these simple maintenance tips, you can ensure that your retaining wall remains strong, durable, and visually appealing for many years to come. Investing a little time in regular upkeep will help you avoid costly repairs and protect your landscaping investment.

Common Mistakes To Avoid
When it comes to constructing retaining walls, there are a few common mistakes that people often make, which can compromise the structure and lead to bigger issues down the road. Whether you’re tackling this project on your own or hiring a contractor, avoiding these pitfalls is essential to ensure that your retaining wall stands the test of time.
1. Skipping the Foundation
One of the most critical elements of a successful retaining wall is its foundation. Often, homeowners try to cut costs or speed up the process by skimping on the base layer. However, this is a mistake that can have serious consequences. The foundation supports the entire wall, and without a proper base, the wall can shift, crack, or even collapse over time. The foundation needs to be level, strong, and made from the right materials, such as compacted gravel. Taking shortcuts at this stage may seem like a time-saver, but it can lead to costly repairs or even a complete rebuild down the line.
2. Improper Drainage
Water is the silent enemy of retaining walls. Without proper drainage, water can accumulate behind the wall, creating pressure that can eventually cause the wall to fail. This is especially common in areas with heavy rainfall or where the water table is high. To prevent this, it’s essential to install a drainage system that allows water to flow away from the wall, rather than getting trapped behind it. This often involves using drain pipes, gravel backfill, and ensuring that the soil around the wall is graded to direct water away from the structure. Ignoring drainage issues is a recipe for disaster, as water pressure can quickly turn a solid retaining wall into a leaning or crumbling one.
3. Ignoring Local Regulations
Before starting any construction project, it’s vital to check your local building codes and regulations. Many people overlook this step, thinking that a retaining wall is a minor project that doesn’t require permits. However, depending on the height and location of your wall, you may need to obtain the proper permits from your local municipality. Building codes are in place to ensure that structures like retaining walls are safe and built to last. Failing to adhere to these regulations can result in fines, forced alterations, or even the requirement to tear down the wall altogether. Always do your homework and make sure you’re in compliance before you start digging.
4. Not Considering Soil Type
Soil type plays a significant role in the design and stability of a retaining wall, yet it’s something that many people overlook. Different soils have different load-bearing capacities and drainage properties, which can affect how the wall is built. For instance, sandy soil drains well but may not be able to support a heavy wall, while clay soil holds moisture and can increase pressure on the wall. Understanding the type of soil you’re working with allows you to design the wall accordingly—whether that means reinforcing the structure, using different materials, or adjusting the drainage system. Ignoring soil conditions can lead to a wall that’s not structurally sound, making it more prone to failure over time.
Building a retaining wall is more complex than it may seem at first glance. By avoiding these common mistakes—skipping the foundation, neglecting proper drainage, ignoring local regulations, and failing to consider soil type—you can ensure that your retaining wall remains strong and effective for years to come. Taking the time to plan and build it right the first time will save you from headaches and expensive repairs in the future.
FAQs: About Replace Existing Retaining Wall
How do I know when it’s time to replace my retaining wall?
You’ll know it’s time to replace your retaining wall if you see signs such as large cracks, bulging, leaning, or drainage issues. Aging materials like wood or stone may also deteriorate over time, leading to structural failure. If the wall is no longer functional or aesthetically pleasing, it may be time to consider replacement.
Can I replace a retaining wall myself, or should I hire a professional?
It depends on the scope of the project and your experience. Small retaining walls under 4 feet in height are typically manageable for a DIY project if you have basic construction knowledge and tools. However, larger, more complex walls or those requiring permits may be better handled by a professional.
How much does it cost to replace a retaining wall?
The cost to replace a retaining wall varies depending on the materials, wall size, and labor involved. On average, DIY replacements can range from $10 to $30 per square foot, while hiring a professional can cost between $40 and $100 per square foot, depending on complexity.
What is the best material to use for a retaining wall replacement?
The best material depends on your needs, climate, and budget. Common materials include concrete blocks (durable and versatile), natural stone (aesthetically pleasing but expensive), and wood (cost-effective but prone to deterioration over time). Consider your landscape design, soil conditions, and desired lifespan when choosing the right material.
Do I need a permit to replace an existing retaining wall?
Whether you need a permit depends on local building regulations. In many areas, walls over a certain height (often 3-4 feet) will require a permit. It’s essential to check with your local building authority before starting the project to ensure compliance.
How long does it take to replace a retaining wall?
The time it takes to replace a retaining wall depends on the size of the wall, the materials used, and whether you’re doing it yourself or hiring a professional. A small DIY project may take a few weekends, while larger, more complex walls could take professionals several days to complete.
What are the common mistakes to avoid when replacing a retaining wall?
Common mistakes include skipping the proper foundation, not addressing drainage issues, using the wrong materials for the soil type, and ignoring local regulations. These errors can lead to premature wall failure, water damage, or fines for non-compliance.
How do I ensure proper drainage for my retaining wall?
Proper drainage is critical to the longevity of your retaining wall. Install a drainage system behind the wall, such as perforated pipes, and backfill with gravel to allow water to escape. Without adequate drainage, water can build up behind the wall, causing pressure that may lead to structural failure.
How long will my new retaining wall last?
The lifespan of your new retaining wall depends on the materials used, construction quality, and maintenance. Concrete and stone walls can last 50 to 100 years with proper care, while wood walls may only last 20 years due to weathering and rot.
What maintenance is required for a new retaining wall?
Regular maintenance for your retaining wall includes inspecting for cracks or signs of movement, keeping drainage systems clear, and cleaning the surface to prevent buildup of dirt or mold. Depending on the material, you may also need to reseal the wall every few years to protect it from moisture.
Conclusion
In conclusion, replacing a retaining wall can be a transformative project for your property, and knowing when it’s time to replace it is key to maintaining both safety and aesthetics. Whether you choose to tackle the job yourself or hire a professional, it’s important to weigh the pros and cons of each approach. By following a clear, step-by-step guide, you can ensure the job is done efficiently and correctly. With the right preparation and materials, this is a manageable task that offers great rewards. So, don’t hesitate—start planning your retaining wall replacement today, seek professional assistance if needed, and check out more helpful resources available on our blog to guide you through every step of the process.
About the Author:
Mike Veail is a recognized digital marketing expert with over 6 years of experience in helping tradespeople and small businesses thrive online. A former quantity surveyor, Mike combines deep industry knowledge with hands-on expertise in SEO and Google Ads. His marketing strategies are tailored to the specific needs of the trades sector, helping businesses increase visibility and generate more leads through proven, ethical methods.
Mike has successfully partnered with numerous companies, establishing a track record of delivering measurable results. His work has been featured across various platforms that showcase his expertise in lead generation and online marketing for the trades sector.
Learn more about Mike's experience and services at https://theleadguy.online or follow him on social media: