Welcome to your go-to guide for building a retaining wall in Auckland—the smart way. Whether you’re planning a DIY weekend project or working with a contractor, understanding the materials needed for a retaining wall in Auckland is the first step to getting it right. With the city’s unique terrain, variable soil types, and weather patterns, choosing the right materials isn’t just about looks—it’s about durability, drainage, and compliance too. In this comprehensive post, we’ll break down everything you need to know—from the essential building blocks to drainage solutions and optional tools—so you can confidently plan and execute your retaining wall with clarity and purpose.
To build a retaining wall in Auckland, you’ll need key materials like retaining wall blocks or treated timber, crushed stone or gravel for backfill, drainage pipes, geotextile fabric, and a compacted base material such as base course. Depending on the wall type and height, you may also require concrete, mortar, and steel reinforcement. These materials ensure stability, proper drainage, and compliance with local Auckland conditions.
- Why Retaining Walls Are Common In Auckland
- Planning Your Retaining Wall: A Quick Overview
- Core Materials You’ll Need For A Retaining Wall In Auckland
- Optional Add-Ons And Tools
- Where To Source Materials In Auckland
- Cost Breakdown (Typical Ranges)
- Tips For A Smooth DIY Build
- Common Mistakes To Avoid
- FAQs: Materials Needed For A Retaining Wall In Auckland
- What are the essential materials needed to build a retaining wall in Auckland?
- What type of retaining wall materials are best suited for Auckland’s climate?
- Do I need drainage materials for my retaining wall?
- Can I build a retaining wall myself, or should I hire a professional?
- How deep should the foundation or base of the retaining wall be?
- Where can I buy retaining wall materials in Auckland?
- What is geotextile fabric, and why is it important?
- How much do retaining wall materials typically cost in Auckland?
- Are building permits required for retaining walls in Auckland?
- How can I make sure my retaining wall lasts long-term?
- Conclusion
Why Retaining Walls Are Common In Auckland
Retaining walls are a familiar sight across Auckland’s residential and commercial properties—and for good reason. Their popularity isn’t just about aesthetics; it’s largely driven by the city’s unique natural landscape and environmental conditions. When you factor in Auckland’s geological makeup, frequent rainfall, and hilly terrain, retaining walls become more than just a nice-to-have feature—they’re often a practical necessity.
Auckland’s landscape is shaped by centuries of volcanic activity, leaving behind expansive areas of soft, free-draining volcanic soil. While this type of soil is generally great for gardens, it can also be unstable on slopes. This is where retaining walls come into play. By holding back soil and preventing it from shifting or sliding downhill, retaining walls help homeowners stabilize their outdoor spaces. This is especially important in neighborhoods where land plots are built on hillsides or uneven ground, which is common throughout Auckland’s suburban sprawl.
Another major reason retaining walls are common is Auckland’s high rainfall levels. Waterlogged soil can become heavy and prone to movement, especially during storms or extended wet periods. Retaining walls that are built with proper drainage systems prevent water buildup, reduce erosion, and protect foundations and garden structures from damage. Without this support, sloped land can deteriorate quickly, posing risks to safety and property integrity.
In addition to these environmental factors, there are regulatory considerations. For example, Auckland Council may require building consent for retaining walls over a certain height—typically 1.5 meters—or for walls that are near boundaries or support structures. Homeowners are encouraged to review the latest guidelines on the Auckland Council Website or consult a professional before starting construction to ensure compliance with local building codes.
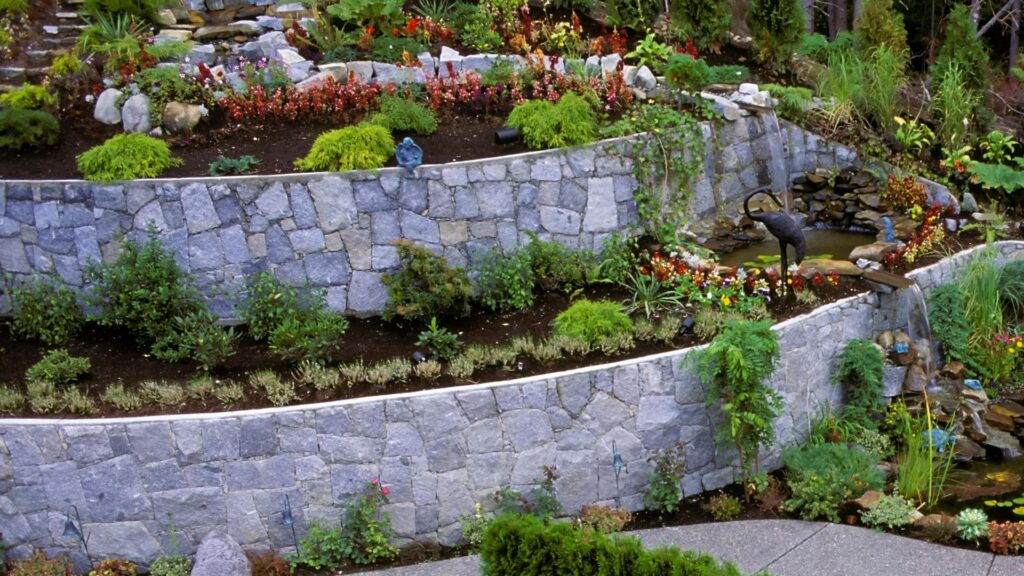
Finally, retaining walls also play a significant role in improving curb appeal and increasing property value. A well-constructed retaining wall can transform a sloped or awkward backyard into a usable, terraced space perfect for gardens, patios, or play areas. It adds structure and definition to landscaping while signaling that a property is well cared for. Whether you’re planning to stay long-term or considering resale in the future, investing in a retaining wall can enhance both the function and aesthetic of your outdoor environment.
In summary, retaining walls are common in Auckland because they address the city’s geological challenges, manage water flow effectively, support local building regulations, and enhance visual appeal. They are a smart, multipurpose solution that continues to grow in relevance as urban development spreads into more complex terrain.
Planning Your Retaining Wall: A Quick Overview
Before you start gathering materials or breaking ground, it’s essential to have a solid plan in place. Retaining walls aren’t just decorative—they serve a functional purpose by holding back soil and managing water flow, especially in Auckland’s hilly and rain-prone landscape. Getting the design and foundation right from the beginning can save you time, money, and potential headaches down the track.
Importance Of Design And Drainage
Design is more than just choosing how the wall looks—it directly affects how well it performs over time. A well-designed retaining wall should factor in the type of materials used, wall height, soil conditions, and especially water drainage. Without proper drainage, water pressure can build up behind the wall, causing it to bulge, crack, or even collapse.
Drainage is not optional—it’s a key structural element. This includes installing a perforated drainage pipe (ag pipe), placing gravel or scoria behind the wall, and using geotextile fabric to prevent soil from clogging your drainage system. Good design always considers how water will move and where it will go.
When To DIY Vs. Hire A Professional
Many homeowners consider building smaller retaining walls themselves, and it can be a satisfying project if the wall is under 1.5 meters in height and not supporting anything above it. However, if your project involves higher walls, sloping land, or nearby structures, it’s often safer and more cost-effective to hire a professional.
A licensed contractor understands building codes, soil behavior, and load calculations that are critical for safety and compliance. In Auckland, walls over a certain height or near property boundaries may require council consent, which professionals can help manage.
Basic Considerations:
- Height And Length:
How tall and long your wall needs to be will influence the type of materials used and whether you need engineering support. Taller walls may require reinforced materials or tiered construction. - Soil Type:
Understanding your soil is crucial. Clay-heavy soil retains water and can add significant pressure behind your wall, while sandy soils may require additional stabilization. Conducting a soil test or consulting a professional can guide the material and drainage choices. - Drainage:
This deserves repeating because poor drainage is one of the main reasons retaining walls fail. Always plan for how water will escape from behind the wall using a combination of gravel backfill, drainage pipes, and proper wall design. - Load (e.g., Traffic, Structures Above):
If your retaining wall supports a driveway, parking area, or even a fence or shed, it must be designed to handle the additional load. These types of walls typically require reinforced concrete blocks or timber and may need to be engineered and consented.
Planning thoroughly from the start ensures that your retaining wall will be functional, safe, and long-lasting. With Auckland’s unique terrain and climate, taking time to assess these foundational elements is well worth the effort.
Core Materials You’ll Need For A Retaining Wall In Auckland
Before you break ground on your retaining wall project, it’s essential to understand the core materials involved. Each plays a specific role in ensuring your wall is structurally sound, long-lasting, and suited to Auckland’s unique terrain and climate. This section will guide you through the main materials you’ll need—from the visible building blocks to the critical behind-the-scenes components that protect your wall from failure.
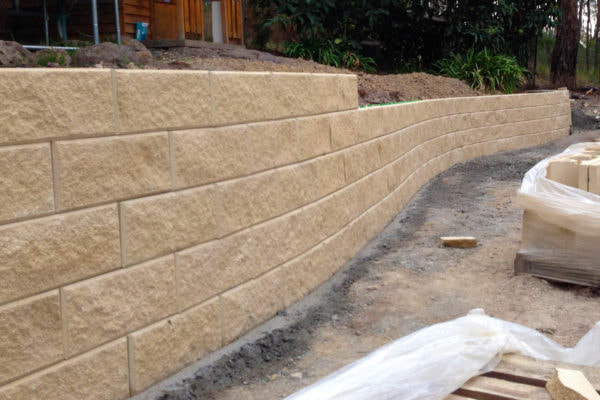
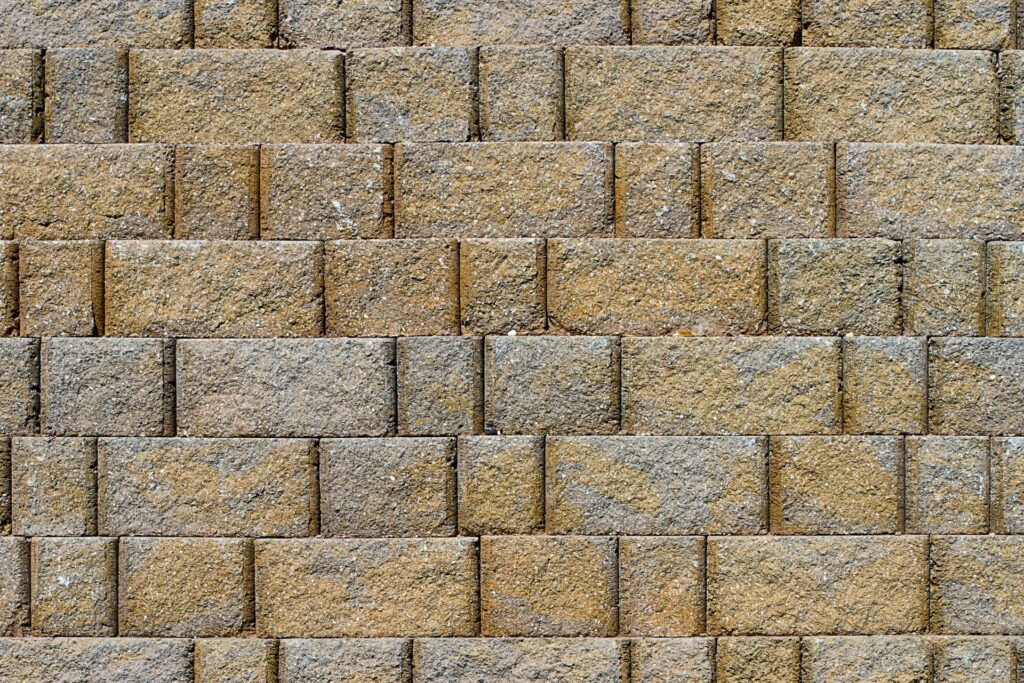
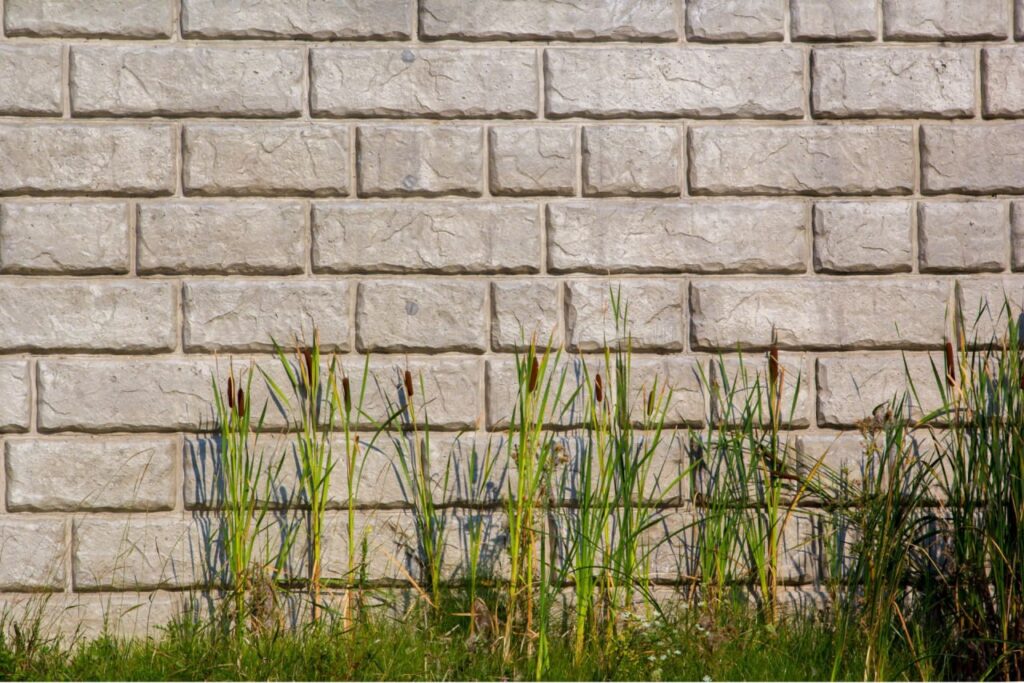
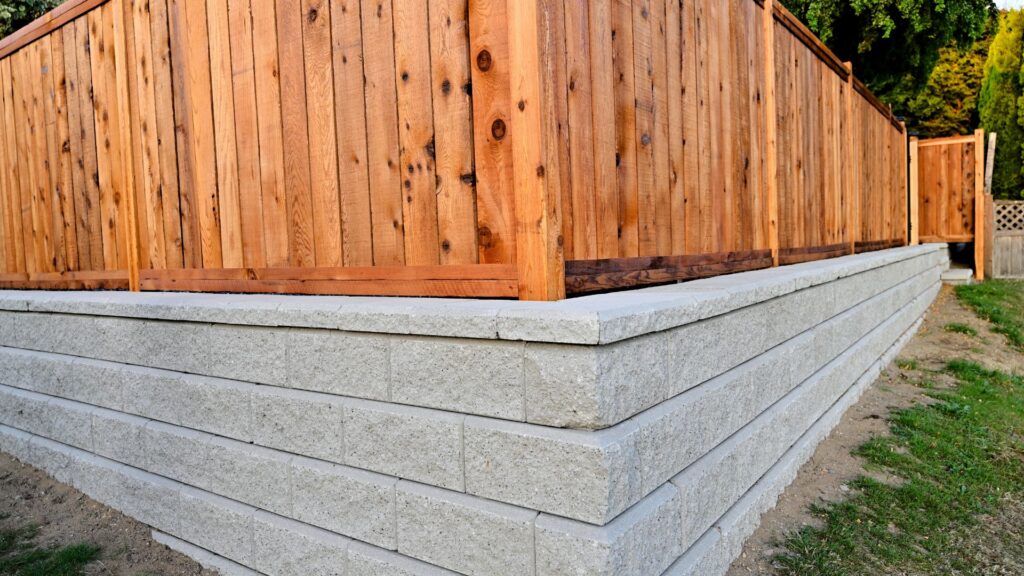
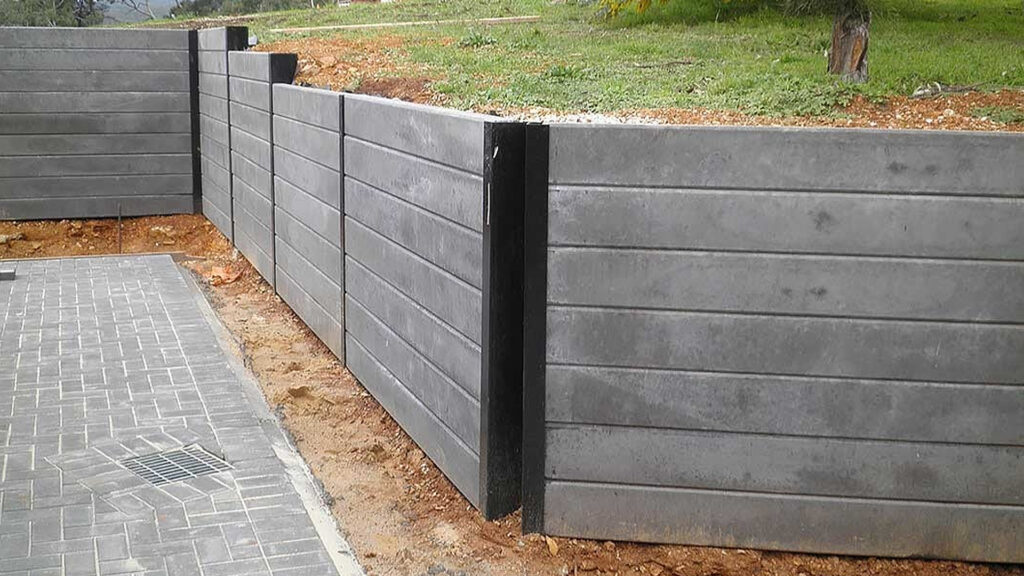
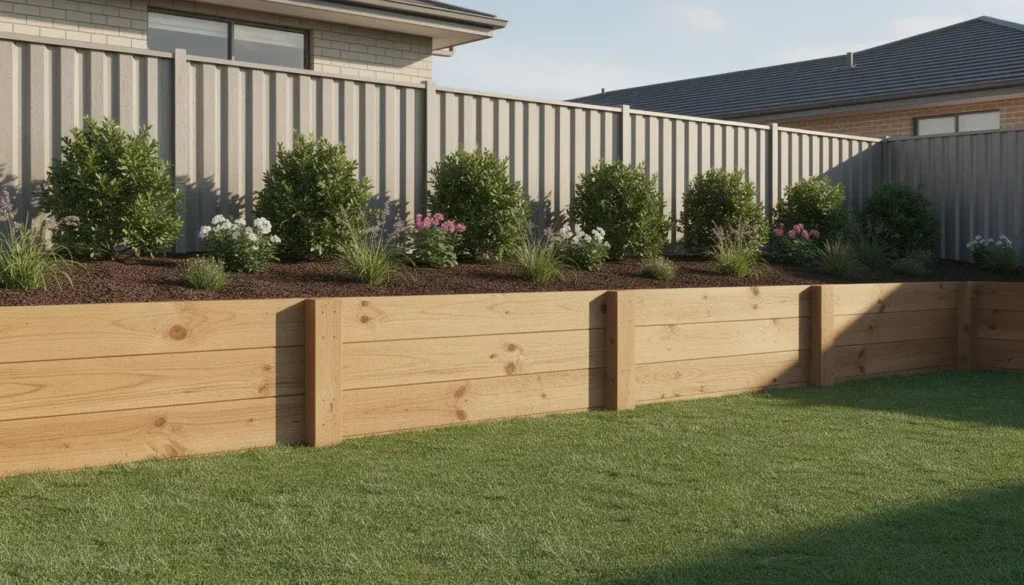
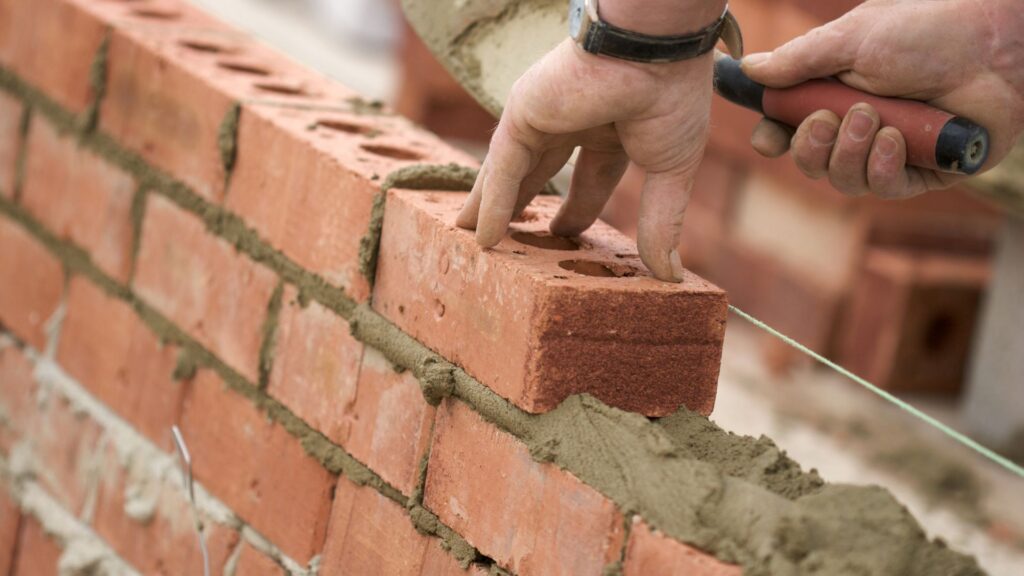
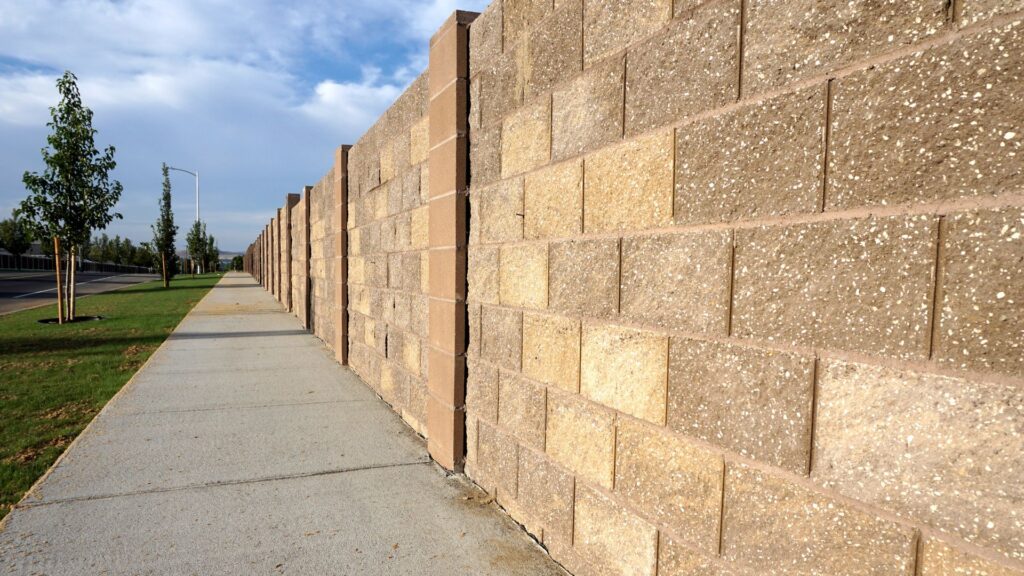
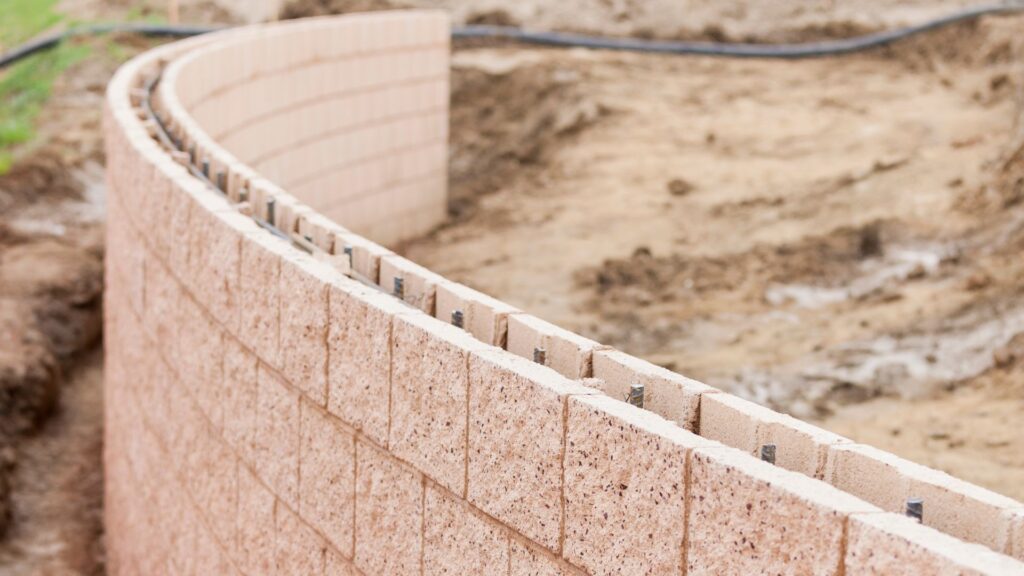
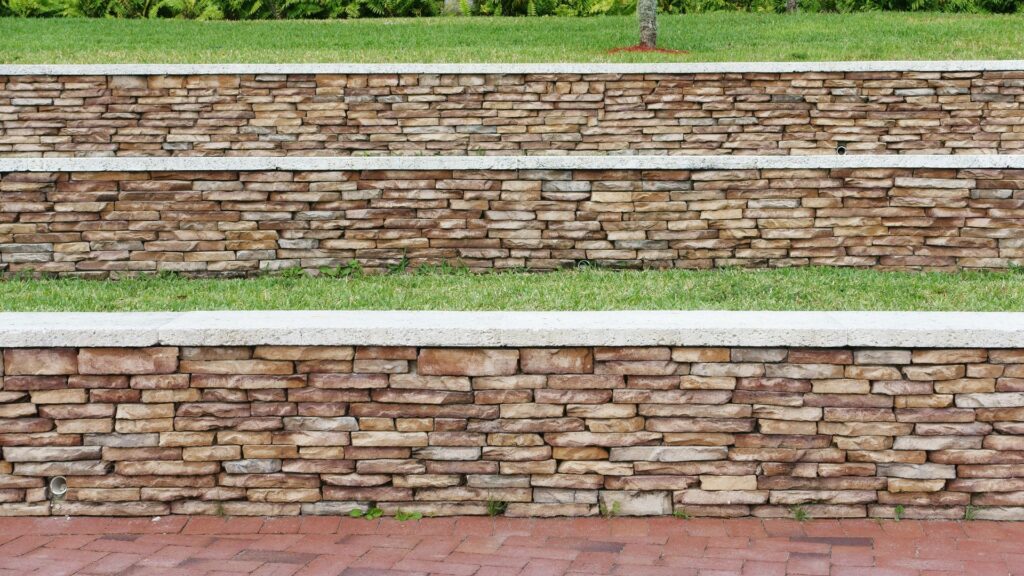
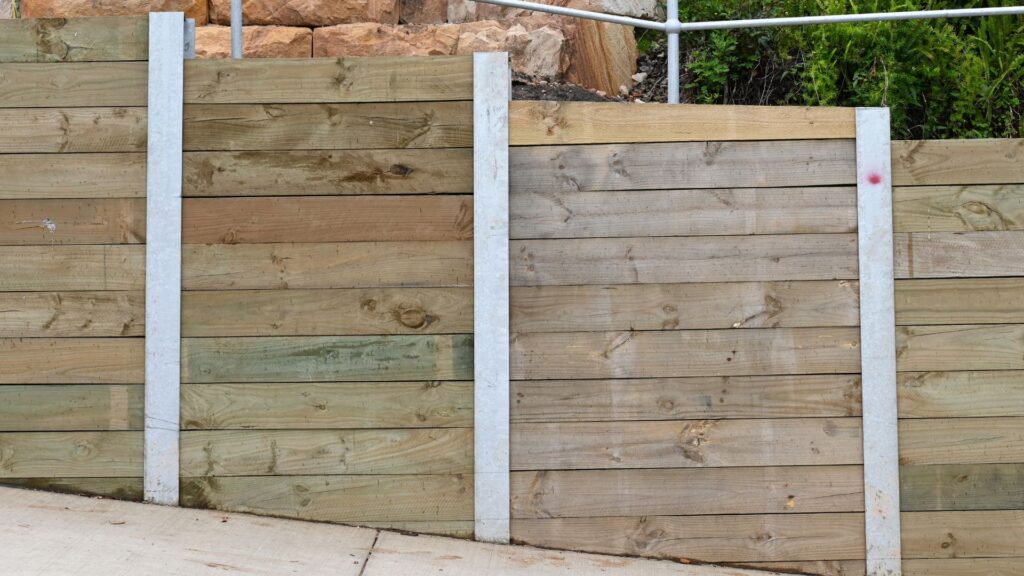
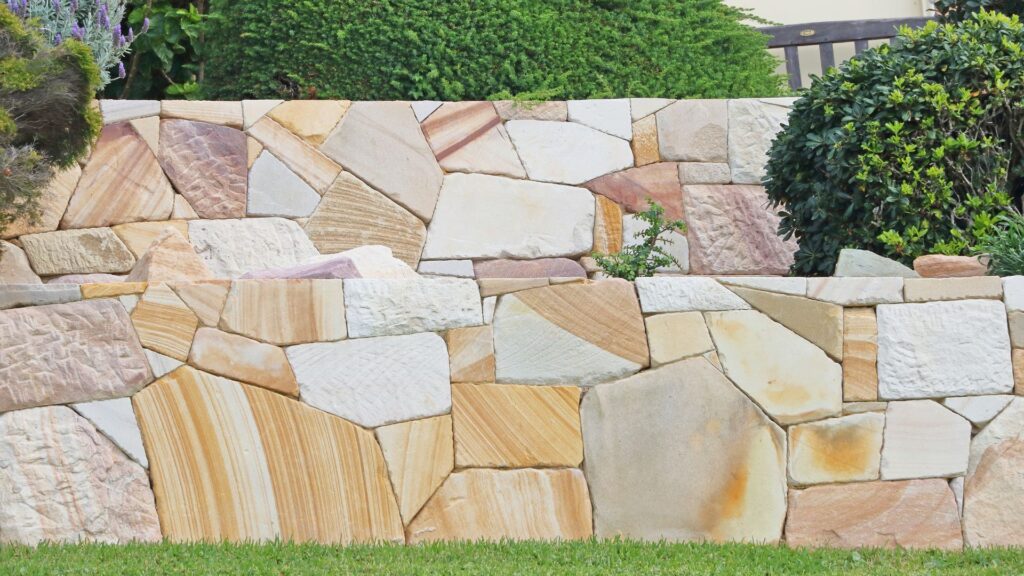
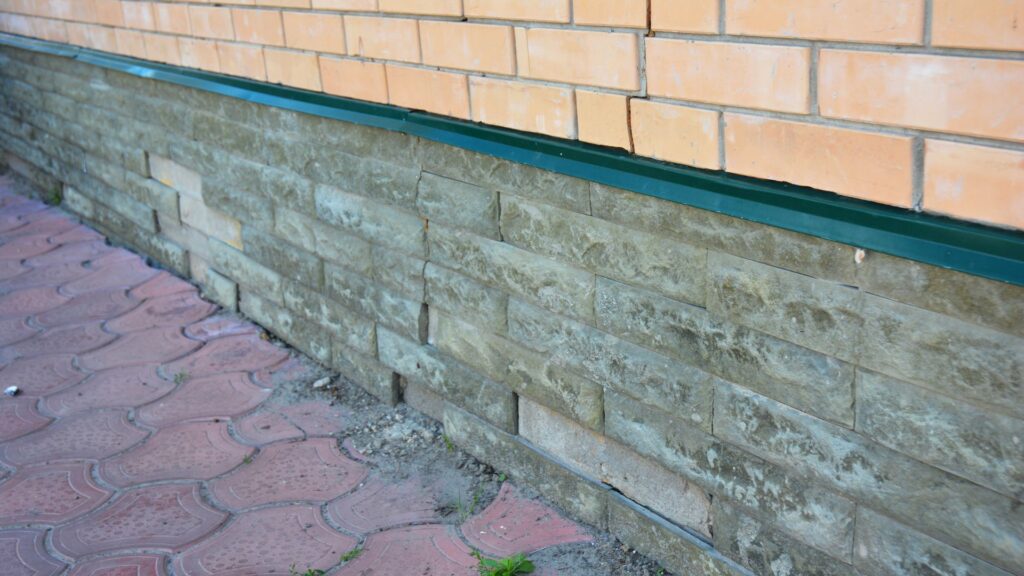
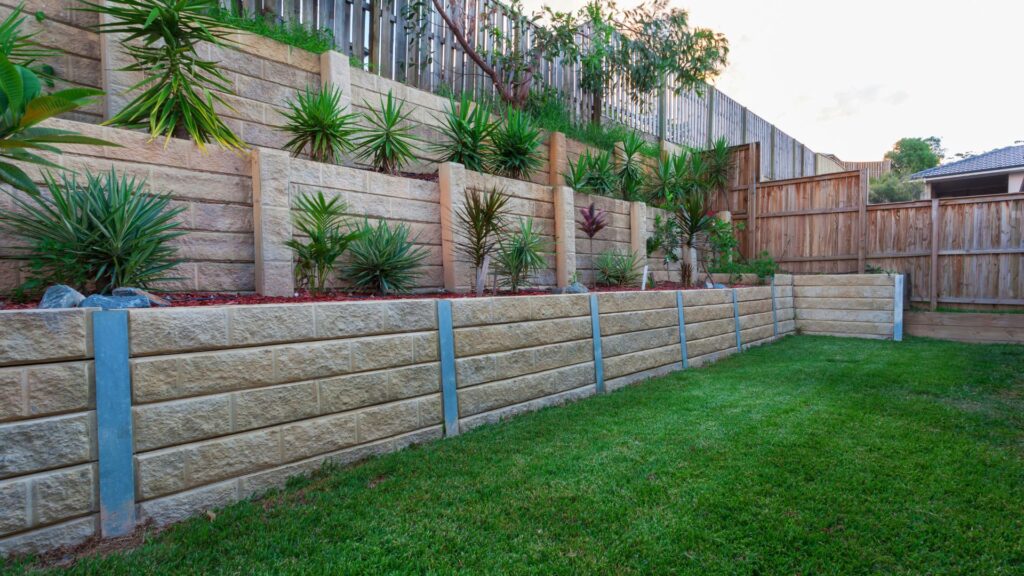
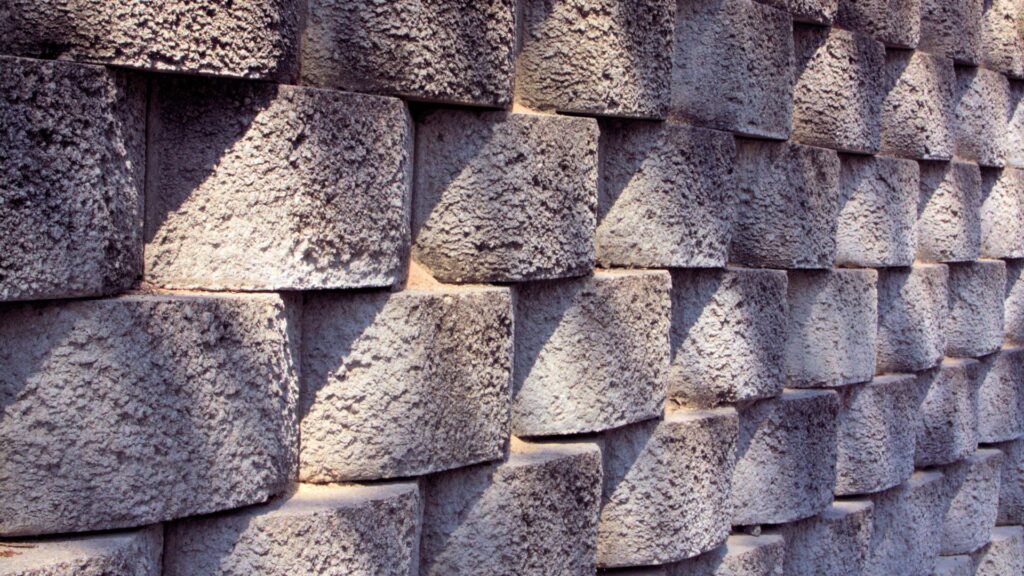
Retaining Wall Blocks, Bricks, Or Timber
Choosing the right primary building material is your first big decision. It not only defines the look and style of your wall but also determines how much effort and engineering will go into construction. Here are the most common material types used across Auckland:
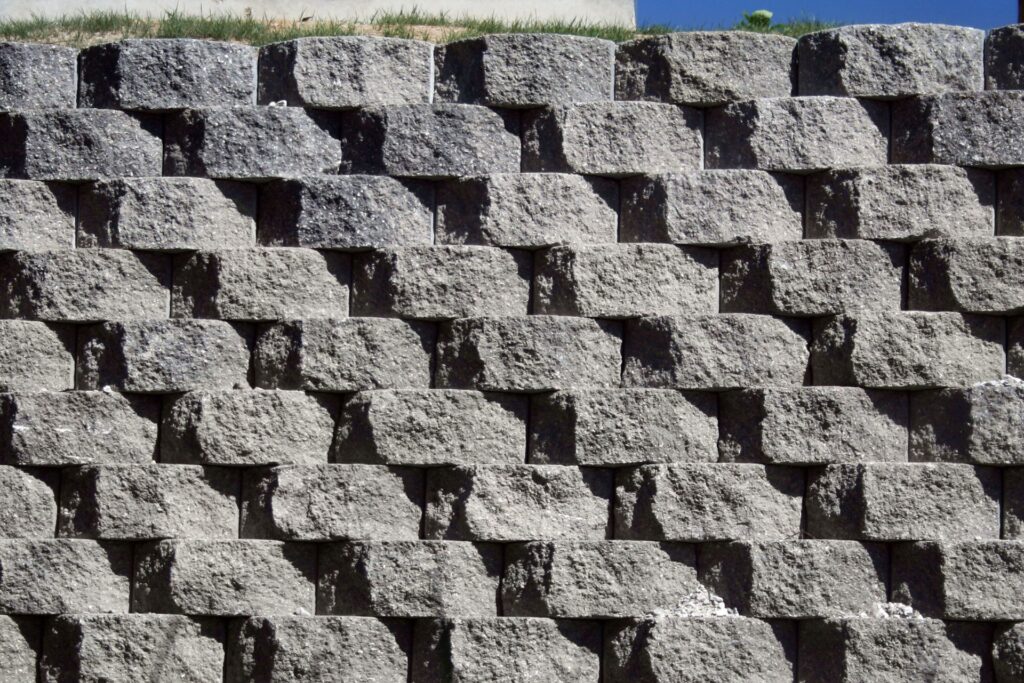
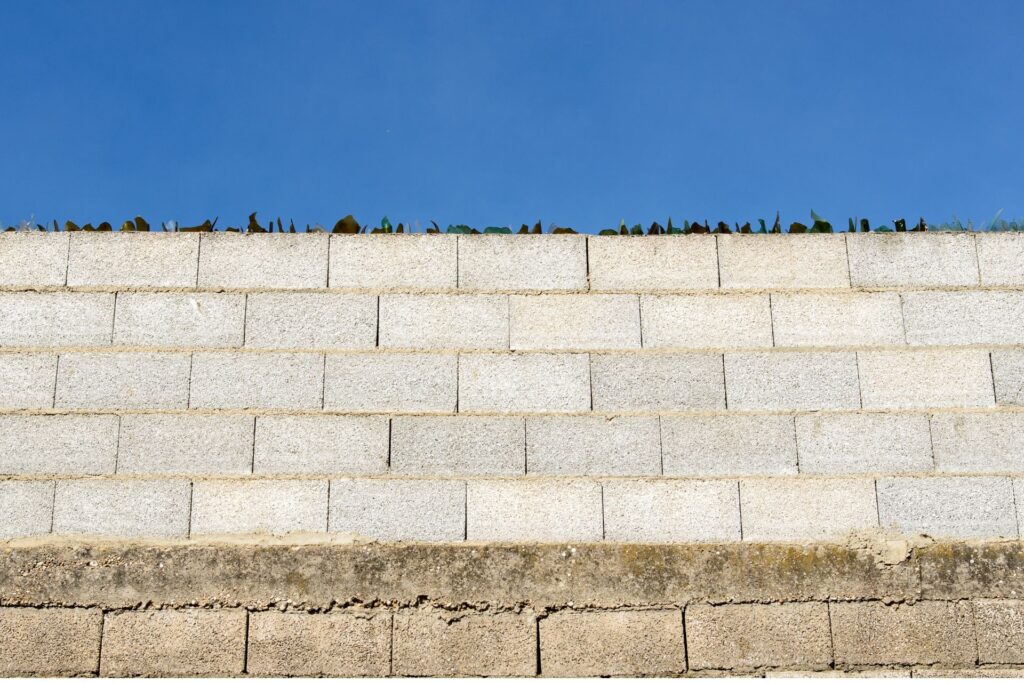
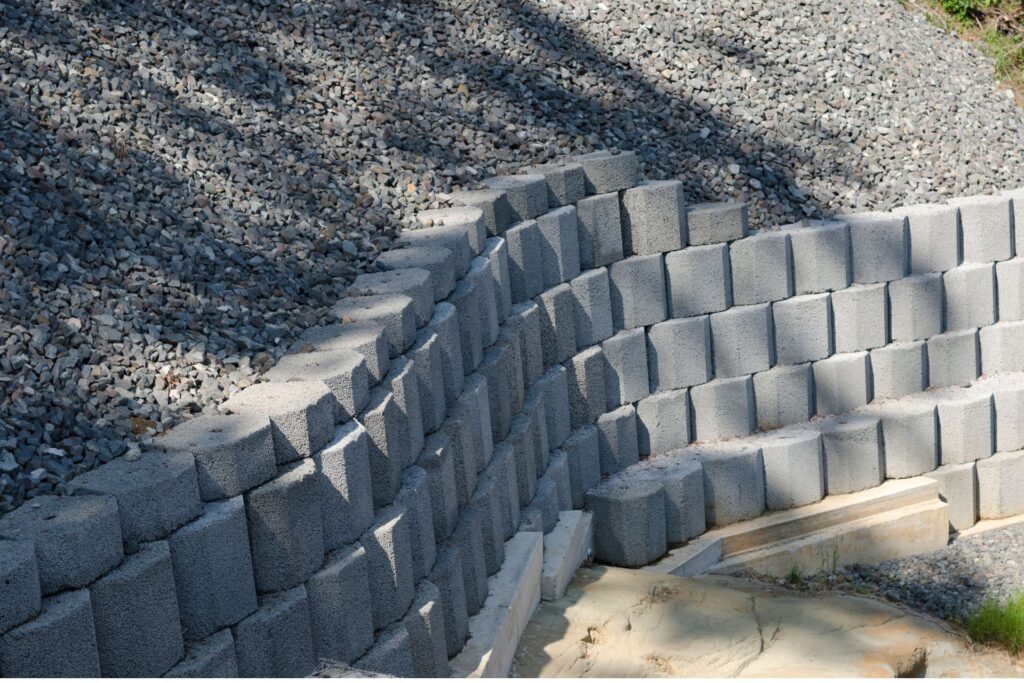
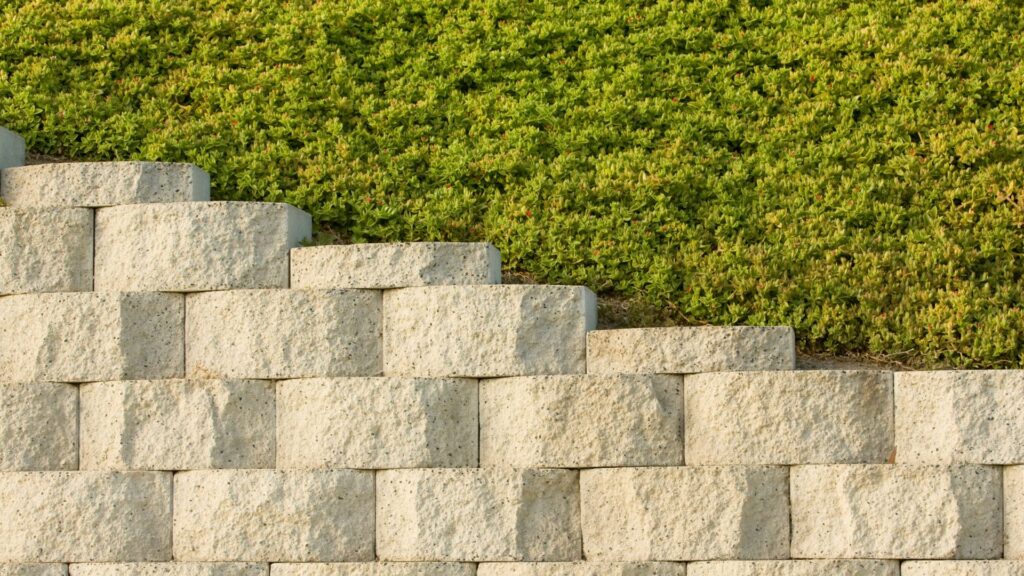
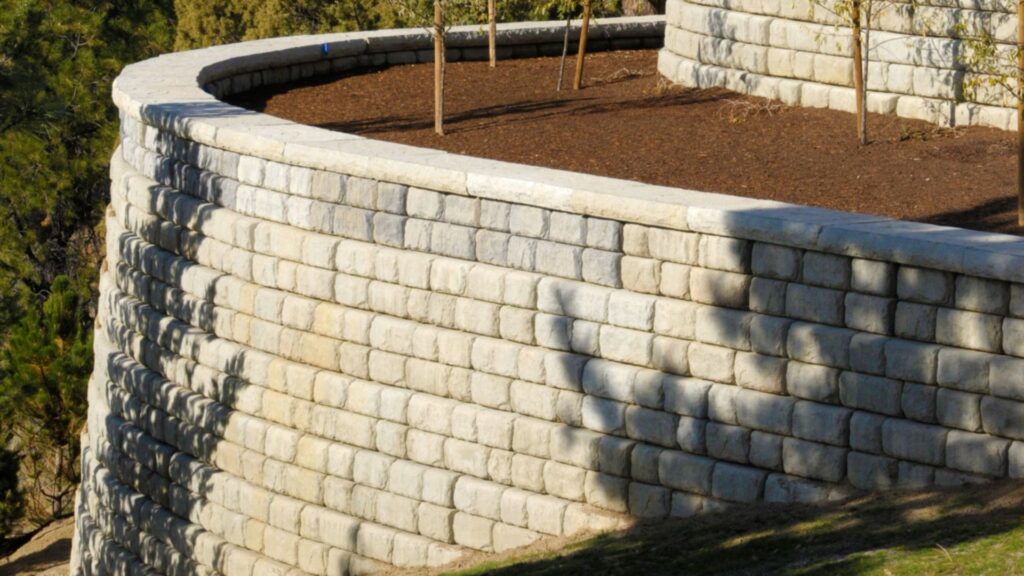
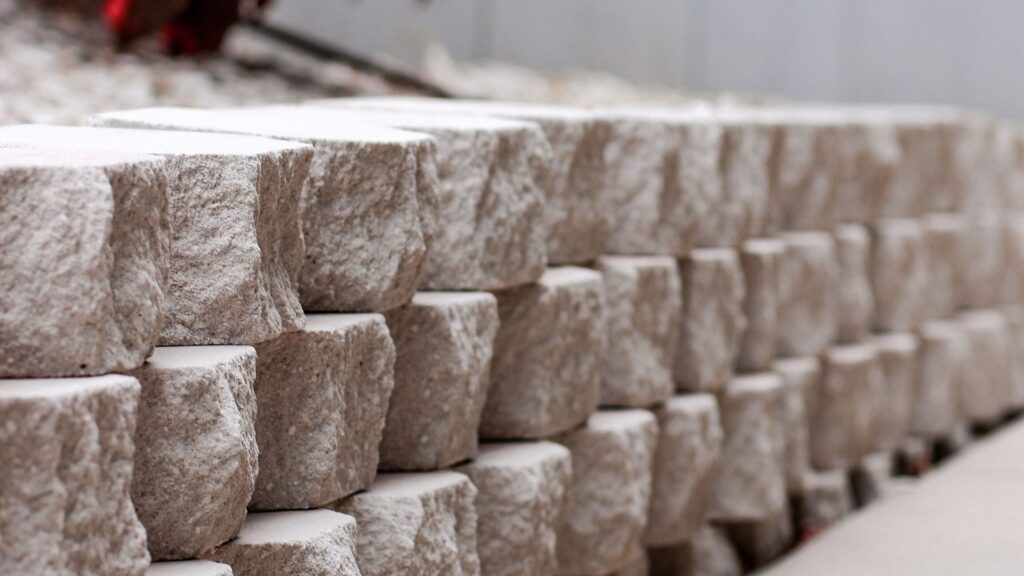
- Concrete Blocks: These are one of the most popular options due to their strength, durability, and modular design. They are ideal for larger or more permanent walls and can often interlock, making construction easier. However, they can be heavy and may require machinery for installation.
- Timber Sleepers (Treated): Treated timber is a favorite for residential DIY projects. It is relatively lightweight, easier to cut and handle, and delivers a warm, natural aesthetic. That said, timber is prone to weathering over time and requires proper drainage and treatment to avoid rot, especially in Auckland’s damp conditions.
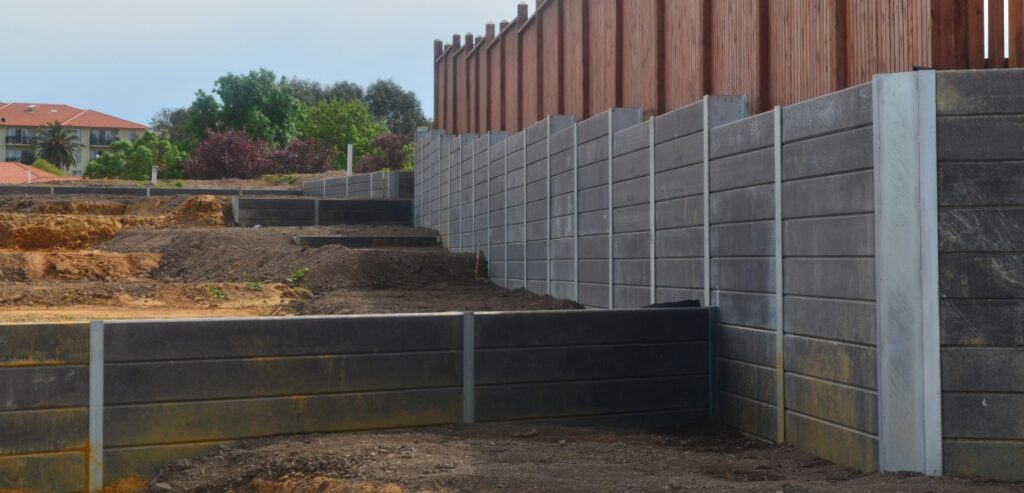
- Gabion Baskets: These are wire cages filled with rocks or stones, often used for erosion control or a rugged, industrial look. Gabions are sturdy and flexible, adapting well to shifting soils, but they are better suited to functional applications than decorative ones.
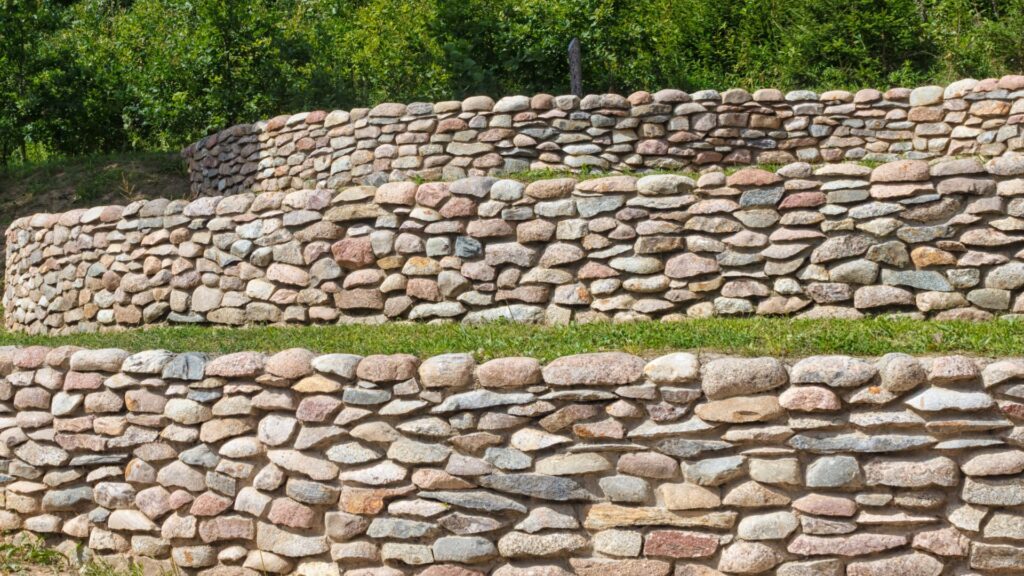
- Natural Stone: For those who want a high-end, timeless appearance, natural stone delivers. It’s long-lasting and visually appealing but can be more expensive and labor-intensive to install. Each stone must be individually placed and sometimes cut, which can extend project timelines.
- Cost Considerations: Timber is typically the most affordable upfront, while natural stone and engineered concrete blocks are on the higher end. Keep in mind that cost isn’t just about materials—it also includes labor, tools, and long-term maintenance.
Backfill Material
Backfill is the material placed behind the retaining wall structure and is often underestimated. Its role in drainage, support, and stability is just as important as the wall itself.
- Crushed Stone vs. Gravel vs. Recycled Aggregate: Crushed stone is the most effective backfill material due to its angular shape, which locks together and allows water to flow through. Gravel is also a common choice and slightly more affordable, though it may shift over time. Recycled aggregates are a budget-friendly alternative and environmentally sustainable, but their drainage performance can vary depending on quality.
- Why It Matters For Drainage And Stability: The right backfill helps relieve pressure from water buildup and stabilizes the wall. Inadequate backfill can lead to bulging, leaning, or collapse—especially with Auckland’s frequent rainfall.
- Tips For Sourcing Locally In Auckland: Look for local quarries or landscape suppliers that offer certified backfill materials. Bulk purchasing is usually more cost-effective, and some suppliers offer delivery directly to your site.
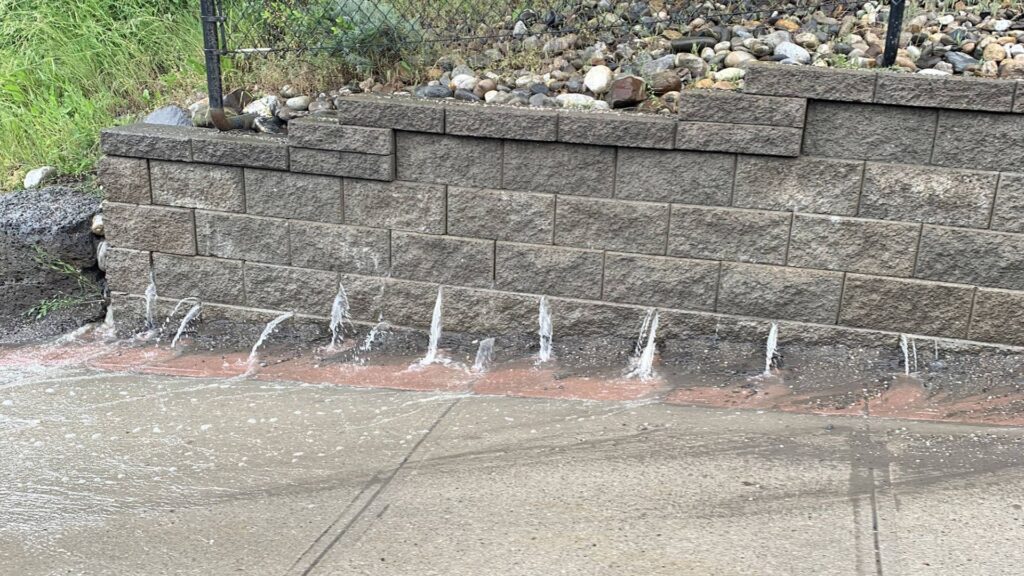
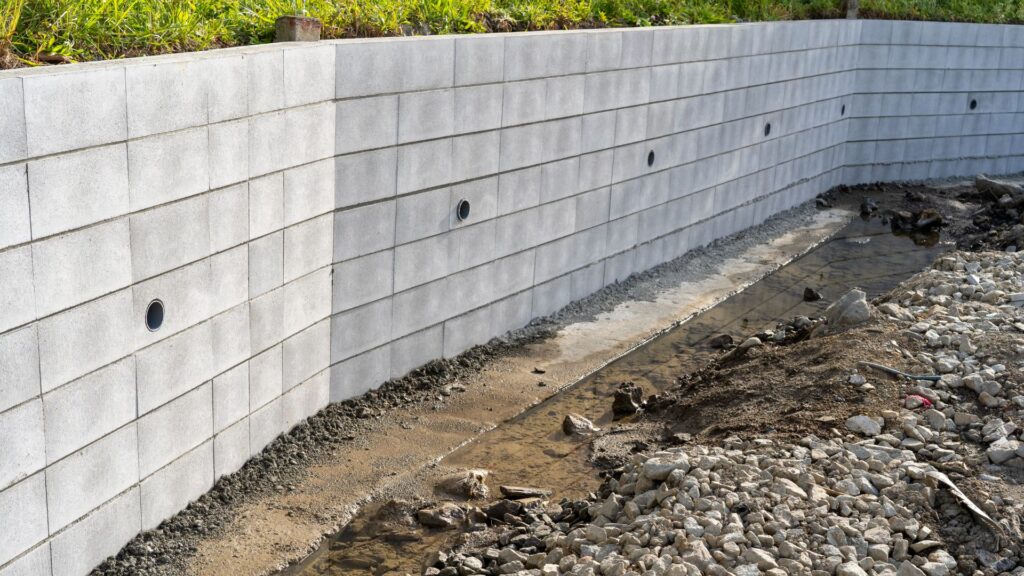
Drainage Materials
Effective drainage is one of the most important factors in the longevity of any retaining wall. Without it, water pressure can build up behind the wall, leading to structural failure.
- Drainage Pipes (Ag Pipe Or Perforated Pipe): These are installed at the base of the wall to direct water away from the structure. Ag pipes are flexible and perforated, allowing water to flow in and be diverted out through drainage outlets.
- Geotextile Fabric (Weed Control + Separation): Placed between soil and gravel layers, geotextile fabric prevents soil from mixing with your drainage materials. This ensures the gravel stays free-draining and prevents clogging over time.
- Drainage Gravel And Scoria: These materials go around and above the drainage pipe, helping water flow toward the exit points while preventing sediment buildup. Scoria is commonly used in Auckland because it is lightweight, porous, and locally available.
Base Or Foundation Material
Every solid retaining wall begins with a stable foundation. Skimping on this step can result in serious structural issues down the line.
- Compacted Base Course Or Crushed Rock: These materials create a stable platform for your wall. Base course is a mixture of crushed gravel and fine particles that compact tightly, offering excellent load-bearing capacity.
- Why A Solid Foundation Is Critical: The base evenly distributes the weight of the wall and resists shifting. Without proper compaction, even a well-built wall can sink or lean over time, especially in Auckland’s variable soil conditions.
- How Deep To Dig Based On Wall Height: As a general rule, the trench should be one-eighth to one-tenth the height of the wall. For a 1.2-meter wall, aim for a base depth of around 150mm to 200mm, followed by compacted base course.
Concrete Or Mortar (If Applicable)
Not every wall needs mortar or concrete, but when it does, it plays a key role in structural integrity.
- When You Need It: If you’re building with concrete blocks, bricks, or natural stone, mortar is often required to bind the materials together. For walls that bear significant load or exceed certain heights, concrete footings may also be necessary.
- Ready-Mix vs. DIY Batching: Ready-mix concrete saves time and ensures consistent quality, especially for larger jobs. DIY batching with cement, sand, and water is more cost-effective for small projects but requires precise mixing and curing times to achieve the right strength.
Steel Reinforcement
When your retaining wall needs to handle more than just soil—like supporting a driveway or building—steel reinforcement becomes essential.
- Rebar And Mesh Use Cases: Rebar (reinforcing bar) and steel mesh add tensile strength to concrete walls, helping them withstand pressure from behind the wall. They’re often embedded in both the base and vertical elements of the wall.
- Compliance With Local Building Codes: Auckland Council has specific requirements for walls over 1.5 meters or those carrying structural loads. Always check whether your project requires engineering sign-off or council consent. Proper reinforcement not only ensures safety but also helps your wall meet legal standards.
Optional Add-Ons And Tools
When planning or building a retaining wall in Auckland, there are a few optional add-ons and tools that can make a significant difference in the look, function, and ease of your project. While these extras may not always be required, they often improve the durability, appearance, and safety of your retaining wall. Below is a closer look at some commonly recommended extras that can elevate the quality of your build.
Wall Caps For Aesthetics
Wall caps are the finishing touch for many retaining walls, especially those made with concrete blocks or stone. These caps sit on top of the wall and serve both a practical and decorative function. In terms of aesthetics, they provide a clean, polished edge that enhances curb appeal. From a functional standpoint, they help protect the wall from water penetration by directing rain away from the core structure, which can increase the longevity of the wall. Wall caps come in various materials and textures, including concrete, natural stone, and manufactured stone, allowing you to match your overall landscaping style.
Landscape Fabric
Though often overlooked, landscape fabric can play a critical role in maintaining the integrity of your retaining wall. Positioned between the backfill material and the soil, this fabric helps prevent soil erosion and keeps sediment from clogging up the drainage system. It also serves as a weed barrier, reducing maintenance in the long run. In Auckland’s climate, where frequent rainfall can increase the risk of waterlogging and drainage issues, using landscape fabric is a smart preventative measure.
Tools: Level, Compactor, Shovel, Wheelbarrow
Having the right tools on hand is essential for both DIY enthusiasts and professionals. A level is crucial for ensuring that each row of blocks or timber is perfectly aligned, which directly impacts the structural integrity of the wall. A compactor (manual or powered) helps achieve a solid, stable foundation by compacting the base material. A shovel is necessary for digging trenches, placing base material, and managing backfill. A wheelbarrow simplifies the transportation of heavy materials like gravel, concrete mix, or blocks, especially across uneven ground. Investing in or renting these tools can significantly speed up the project and reduce physical strain.
Safety Gear: Gloves, Boots, Etc.
Safety should always be a priority when working with heavy materials and construction tools. Wearing gloves helps protect your hands from sharp edges, splinters, and blisters, while sturdy work boots with steel toes offer protection from falling blocks or tools. Additional safety gear may include safety glasses, hearing protection if using power tools, and a high-visibility vest if you’re working near a driveway or public area. Even small precautions can prevent major injuries, making safety gear an essential part of your material checklist.
Incorporating these optional add-ons and tools into your retaining wall project not only enhances the outcome but also helps ensure a smoother, safer, and more efficient build. Whether you’re a homeowner taking on a weekend project or hiring a professional contractor, considering these extras can make a noticeable difference in both short-term results and long-term performance.
Where To Source Materials In Auckland
Finding the right supplier can make or break your retaining wall project—not just in terms of cost, but also in quality, convenience, and long-term satisfaction. In a city like Auckland, where landscapes vary and weather conditions can be unpredictable, sourcing materials from trusted local vendors is a smart first step.
- Local suppliers to consider: Auckland has no shortage of reliable hardware and landscape supply stores. Major retailers like Mitre 10 and Bunnings offer a broad range of retaining wall materials including concrete blocks, treated timber, geotextile fabrics, and drainage solutions. They often stock products designed for New Zealand’s climate, which is a key advantage when building in Auckland. For more specialized or bulk landscape needs, consider local landscape yards or independent suppliers who focus on hardscaping products. Businesses like Central Landscape Supplies, Urban Paving, and Blackwoods Paykels are known for offering a wide selection with expertise to match.
- Tips on choosing quality over price: It might be tempting to go for the cheapest option, but that can lead to costly repairs or rebuilds down the line. When selecting materials, focus on quality certifications, warranty coverage, and suitability for Auckland’s soil and moisture conditions. For timber walls, make sure the wood is H4-treated for ground contact. When looking at concrete or stone blocks, ask about water resistance, load capacity, and whether they require mortar or can be dry-stacked. Don’t be afraid to ask questions—a good supplier will help you compare options based on your specific project needs.
- Ask if delivery is available for heavy items: Retaining wall materials can be bulky and heavy, especially when you’re ordering in larger quantities. Transporting concrete blocks, gravel, or sleepers on your own can be a challenge without the right vehicle. Most Auckland-based suppliers offer delivery services, often at a reasonable fee or free when you meet a minimum spend. Before you purchase, ask about their delivery zones, timelines, and whether they can place the materials close to your work area to save you time and labour. This small step can streamline your project and prevent headaches later on.
In summary, sourcing materials for a retaining wall in Auckland isn’t just about picking the first supplier you find. With the right approach, you can ensure you’re getting quality products that suit local conditions, save on logistics, and work with experts who can support your project every step of the way.
Cost Breakdown (Typical Ranges)
Building a retaining wall in Auckland can vary significantly in price depending on several factors, such as the wall’s size, the materials used, and whether you decide to take the DIY route or hire a professional. Understanding the typical cost ranges will help you plan your budget more effectively and avoid surprises during the project.
Ballpark Costs For DIY Vs. Hiring A Pro
If you’re considering a DIY retaining wall, the cost can be considerably lower compared to hiring a professional, but only if you already have access to some of the tools and equipment needed. For a basic timber or concrete block wall, DIY material costs can range from NZD $100 to $300 per linear meter, depending on the quality of materials used. Labor is where you’ll save the most, as that typically makes up 30%–50% of a professional job.
On the other hand, hiring a professional landscaper or builder for your retaining wall in Auckland can range from NZD $350 to $700 per linear meter, which includes labor, materials, equipment, and site preparation. If you’re dealing with a wall over 1.5 meters or that requires engineering, the price can go even higher due to council compliance and design costs.
Material Cost Estimates By Wall Type
The material you choose plays a huge role in your total budget. Here’s a quick look at typical material costs per square meter:
- Treated Timber Sleepers: $80 to $150 (great for small DIY jobs but needs proper treatment for long-term durability)
- Concrete Blocks: $150 to $300 (higher strength, longer lifespan, ideal for structural or taller walls)
- Natural Stone: $200 to $500+ (premium option with aesthetic appeal, but labor-intensive)
- Gabion Baskets: $120 to $250 (mid-range cost, often used in sloped or erosion-prone areas)
These prices can fluctuate depending on your location within Auckland, supplier rates, and whether bulk discounts are available.
Unexpected Costs (Delivery, Excavation, Disposal)
Beyond materials and labor, there are a few hidden or overlooked costs that can impact your budget:
- Delivery Fees: Heavy items like blocks or gravel often come with delivery charges, ranging from $50 to $200 depending on distance and load size.
- Excavation Costs: If your site is uneven, sloped, or requires soil removal, excavation could cost between $80 to $150 per hour, especially if machinery is required.
- Waste Disposal: Any soil, rock, or material removed from the site needs to be disposed of properly. Expect to pay around $100 to $300 per skip bin or truckload depending on the volume.
If you’re working in an area with difficult access or clay-heavy soil, you might also incur extra charges for specialized equipment or reinforcement materials.
Final Thoughts On Cost Planning
Budgeting for a retaining wall is about more than just the blocks or timber. It’s about understanding the full scope of the project—from what’s visible to what’s below ground. If you’re working with a tight budget, start by choosing the right materials for your soil and site, and don’t forget to factor in drainage, permits, and preparation work.
Taking time to gather accurate quotes from local suppliers and professionals can help you avoid cost blowouts. Whether you DIY or go with a contractor, knowing these cost ranges puts you in a stronger position to make smart, informed decisions.
Tips For A Smooth DIY Build
Building your own retaining wall can be a rewarding and cost-effective project—if done right. While it may seem straightforward at first glance, there’s more to a successful DIY build than just stacking blocks or laying timber. If you’re tackling a small retaining wall on your Auckland property, especially one under 1.5 metres, you’ll want to follow these practical tips to avoid common mistakes and ensure a safe, long-lasting result.
Start Small: Garden Walls Under 1.5m
If this is your first time building a retaining wall, it’s a smart move to start with a smaller project. Walls under 1.5 metres typically don’t require council consent in Auckland, making them more accessible for DIY homeowners. Garden walls, raised beds, or landscape edging are great entry-level projects that allow you to get hands-on experience without the complexity of engineering requirements. Starting small also means you can refine your techniques and build confidence before taking on larger walls.
Always Check With Council If Unsure
One of the biggest DIY missteps is skipping the paperwork or assuming your wall is exempt from local regulations. In Auckland, retaining walls above certain heights or located near boundaries may require a building consent or need to meet specific engineering standards. Even for smaller projects, it’s best practice to check with the Auckland Council before you start digging. A quick consultation can save you from legal headaches, project delays, or having to tear down non-compliant work.
Take Your Time With The Foundation
The foundation is the unsung hero of every retaining wall. It’s not the most glamorous part of the build, but it’s absolutely critical. Rushing through this step—or worse, skipping it—can lead to uneven settling, leaning walls, or even collapse. A good base should include a level trench filled with compacted base course or crushed stone, ideally about one-eighth the height of your wall. Taking your time here ensures that every block or timber sleeper you lay afterward is stable and aligned. It also makes the rest of the project go more smoothly, reducing the need for rework or adjustments.
Final Note
Patience and preparation are your best tools when building a DIY retaining wall. From checking local rules to carefully laying your base, each step builds on the one before it. Treat the project like a long-term investment in your property, not just a weekend chore. A well-built wall will not only look great but also provide structural support for years to come.
Common Mistakes To Avoid
When building a retaining wall in Auckland, it’s easy to get caught up in the excitement of transforming your landscape. But even the most well-intentioned DIYers or new homeowners can fall into traps that compromise the wall’s stability, appearance, and longevity. Below are some of the most common mistakes to avoid—knowing these ahead of time can save you from costly repairs or even complete rebuilds down the line.
Skimping On Drainage
Drainage isn’t just an optional add-on—it’s one of the most critical components of any retaining wall system. In a city like Auckland, where rainfall can be both frequent and heavy, poor drainage can lead to water buildup behind the wall. Over time, this creates hydrostatic pressure, which pushes against the structure and may eventually cause it to bulge, crack, or collapse. Always include proper drainage materials like perforated drainage pipes, scoria or gravel, and geotextile fabric. Ignoring this step not only weakens the wall but also risks damaging nearby foundations and landscaping.
Not Using Treated Timber
If you’re using timber to build your retaining wall, it must be treated for outdoor use—especially in Auckland’s humid and rain-prone environment. Untreated timber may look similar at first but is highly susceptible to moisture damage, decay, and insect infestation. Over time, untreated wood can rot, warp, or disintegrate entirely, leaving you with a failed structure and the headache of redoing the job. Always check the treatment rating of your timber—look for H4 or higher for ground contact applications.
Underestimating Material Quantity
Running out of materials mid-project is not only frustrating—it can also delay your build, increase costs, and affect the final result. Many people underestimate how much base course, backfill, blocks, or timber they’ll need. It’s better to calculate your material quantities carefully and even order a bit extra to account for cutting errors, breakage, or future touch-ups. Take time to plan out your wall’s dimensions and speak with a supplier if you’re unsure how much to order. Having everything ready at the start helps ensure a smoother workflow and a more professional finish.
Ignoring Soil Conditions
Every retaining wall works in partnership with the surrounding soil. In Auckland, the variety of soil types—from volcanic to clay-based—can greatly affect how a wall performs. Some soils drain quickly, while others retain moisture and increase pressure behind the wall. Ignoring these factors can result in poor structural integrity, especially over time. Before building, assess your soil conditions or consult with a landscape professional. You may need to add a gravel base, install stronger drainage, or even alter the wall design based on what lies beneath the surface.
Building a retaining wall is more than just stacking blocks or timber—it’s about engineering a solution that stands up to nature and time. By avoiding these common pitfalls, you set yourself up for a more durable, attractive, and cost-effective result.
Whether you’re sourcing the right materials or need expert help to bring your vision to life, we’re here to make it easy. Visit Retaining Walls Specialist Auckland to explore how we can support your next landscaping project—from planning to delivery.
FAQs: Materials Needed For A Retaining Wall In Auckland
What are the essential materials needed to build a retaining wall in Auckland?
To build a retaining wall in Auckland, you’ll typically need retaining wall blocks or treated timber, backfill material like crushed stone or gravel, drainage pipes, geotextile fabric, base course for the foundation, and possibly concrete or mortar. Depending on the wall height, steel reinforcement may also be required.
What type of retaining wall materials are best suited for Auckland’s climate?
Treated timber, concrete blocks, and natural stone are commonly used in Auckland due to their durability in varying weather conditions. Treated timber is great for small DIY projects, while concrete blocks offer strength and longevity, especially in wetter areas.
Do I need drainage materials for my retaining wall?
Yes, proper drainage is crucial. Without it, water can build up behind the wall, causing pressure and potential failure. Essential drainage materials include perforated drainpipes (ag pipes), gravel or scoria, and geotextile fabric to prevent soil from clogging the drainage area.
Can I build a retaining wall myself, or should I hire a professional?
If your wall is under 1.5 meters and not supporting a structure, you can likely build it yourself with the right tools and knowledge. However, for taller or structural walls, it’s best to consult a licensed professional and check with Auckland Council for any consent requirements.
How deep should the foundation or base of the retaining wall be?
The depth of the foundation depends on the height of the wall. As a general rule, the base trench should be at least one-eighth the height of the wall and filled with compacted base course or crushed rock for stability.
Where can I buy retaining wall materials in Auckland?
Popular suppliers include Bunnings Warehouse, Mitre 10, and local landscape supply companies. Many offer delivery services for bulk orders. Always check for product availability and material specs suited for outdoor and structural use.
What is geotextile fabric, and why is it important?
Geotextile fabric is a permeable material used to separate soil from drainage gravel. It prevents soil from washing into drainage areas, helping maintain proper water flow and prolonging the wall’s stability.
How much do retaining wall materials typically cost in Auckland?
Costs vary based on wall size and materials. On average, materials for a small DIY retaining wall can range from NZD $100–$300 per meter. Concrete blocks tend to be more expensive than timber, but they offer greater strength and longevity.
Are building permits required for retaining walls in Auckland?
Yes, you may need building consent if the wall is over 1.5 meters high or supporting a structure. It’s essential to consult Auckland Council regulations before starting your project to ensure compliance.
How can I make sure my retaining wall lasts long-term?
Use high-quality, weather-resistant materials, install proper drainage, ensure a solid base foundation, and follow correct installation practices. Regularly inspect for signs of movement, water buildup, or timber rot, and maintain as needed to extend its lifespan.
Conclusion
The materials you choose truly make all the difference when it comes to building a safe, functional, and long-lasting retaining wall in Auckland. From selecting the right type of wall blocks or treated timber, to ensuring proper drainage with quality backfill, fabric, and pipes, every detail plays a critical role in the success of your project. While many homeowners feel confident tackling smaller DIY builds, it’s always a good idea to consult a local professional if you’re unsure about the design, materials, or structural requirements—especially with Auckland’s unique terrain and council regulations. Need help planning your retaining wall? Reach out to a local Auckland expert or check out our DIY resources to get started on the right foot.
About the Author:
Mike Veail is a recognized digital marketing expert with over 6 years of experience in helping tradespeople and small businesses thrive online. A former quantity surveyor, Mike combines deep industry knowledge with hands-on expertise in SEO and Google Ads. His marketing strategies are tailored to the specific needs of the trades sector, helping businesses increase visibility and generate more leads through proven, ethical methods.
Mike has successfully partnered with numerous companies, establishing a track record of delivering measurable results. His work has been featured across various platforms that showcase his expertise in lead generation and online marketing for the trades sector.
Learn more about Mike's experience and services at https://theleadguy.online or follow him on social media: